Valor FitnessPeg Boards - Climbing Pegboards- Plywood Wall Mount - Cross Training Gymnastic Rock Climbing Ninja Training Pegboard - Gym Workout Equipment
A**R
The Peg Board Is Fantastic. Well made and extremely durable
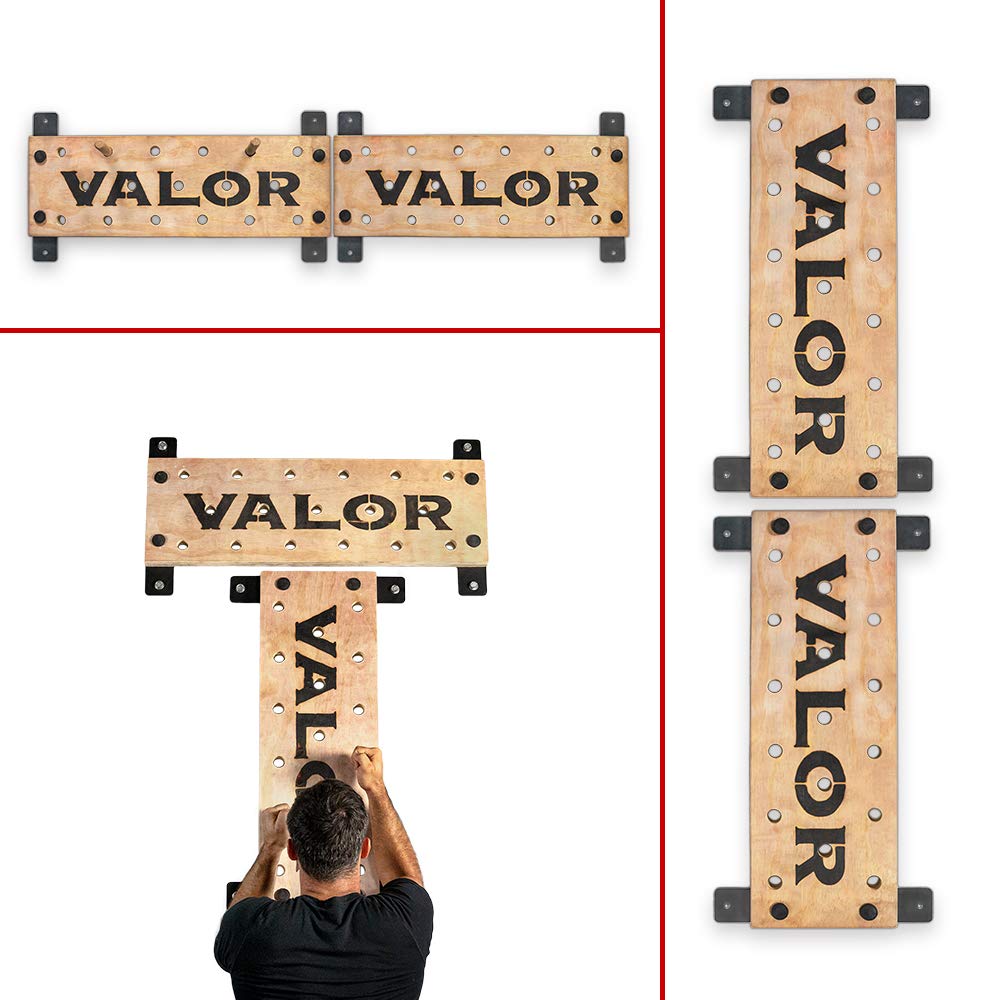
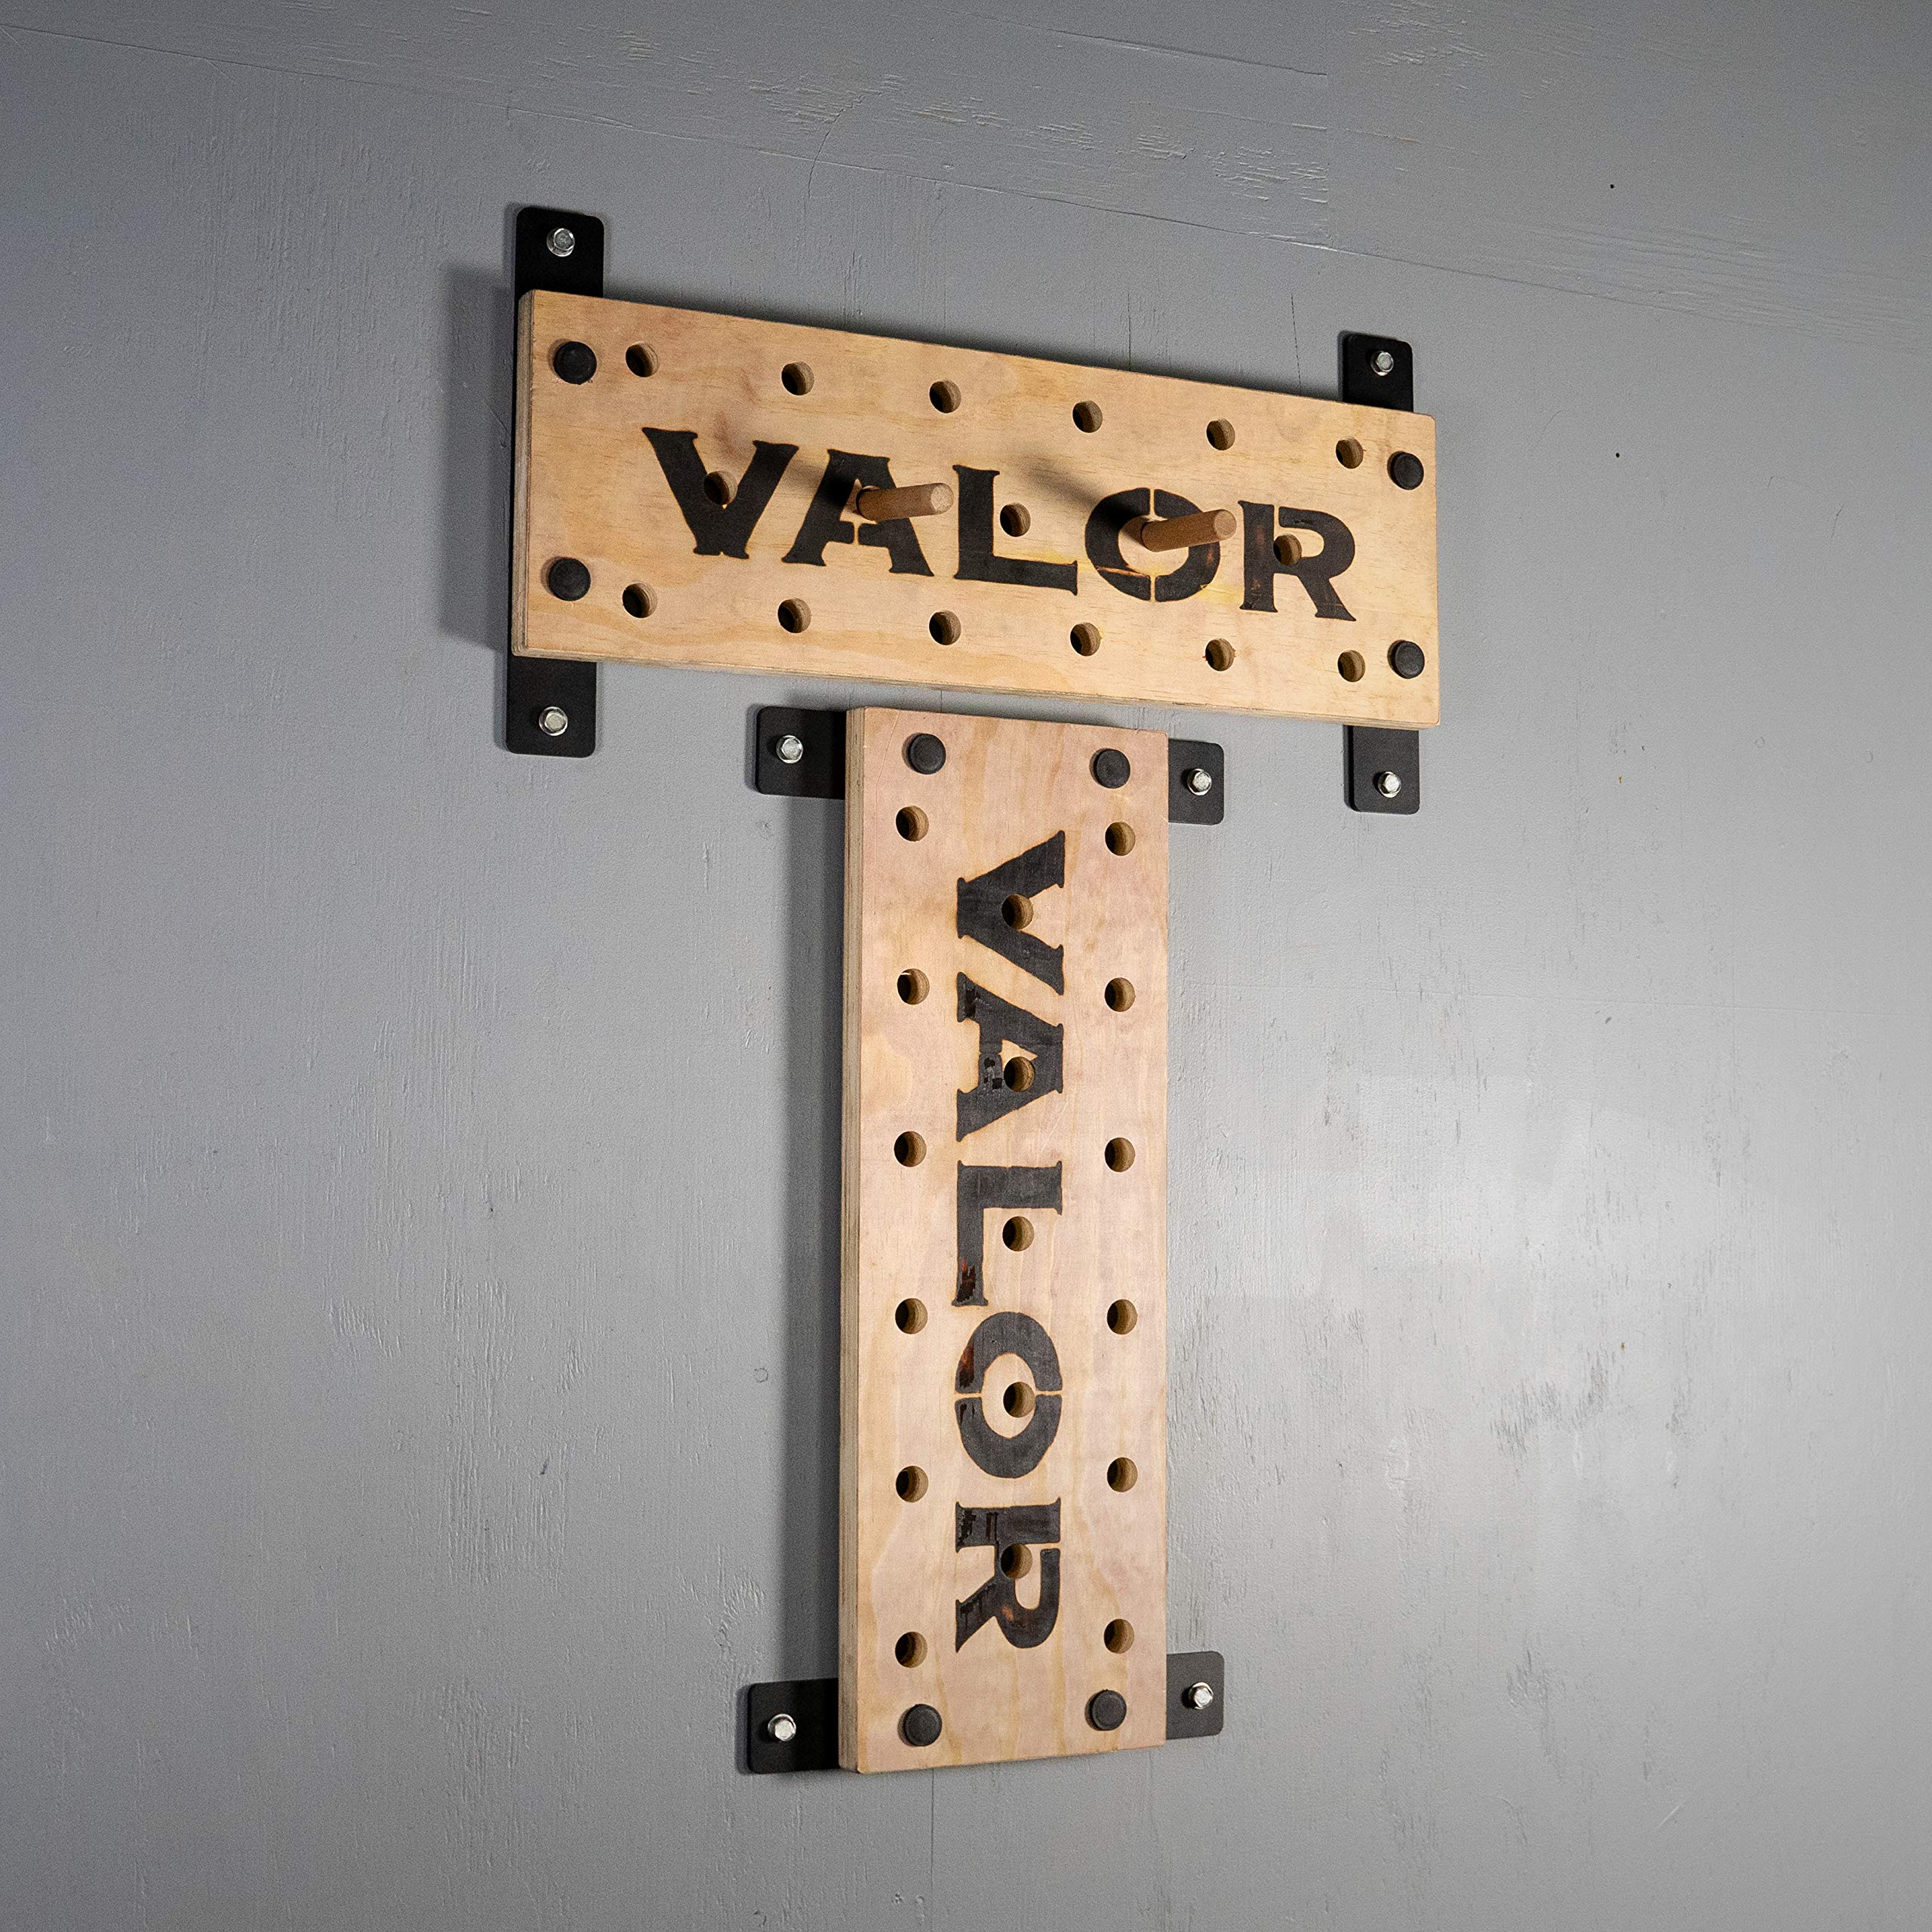
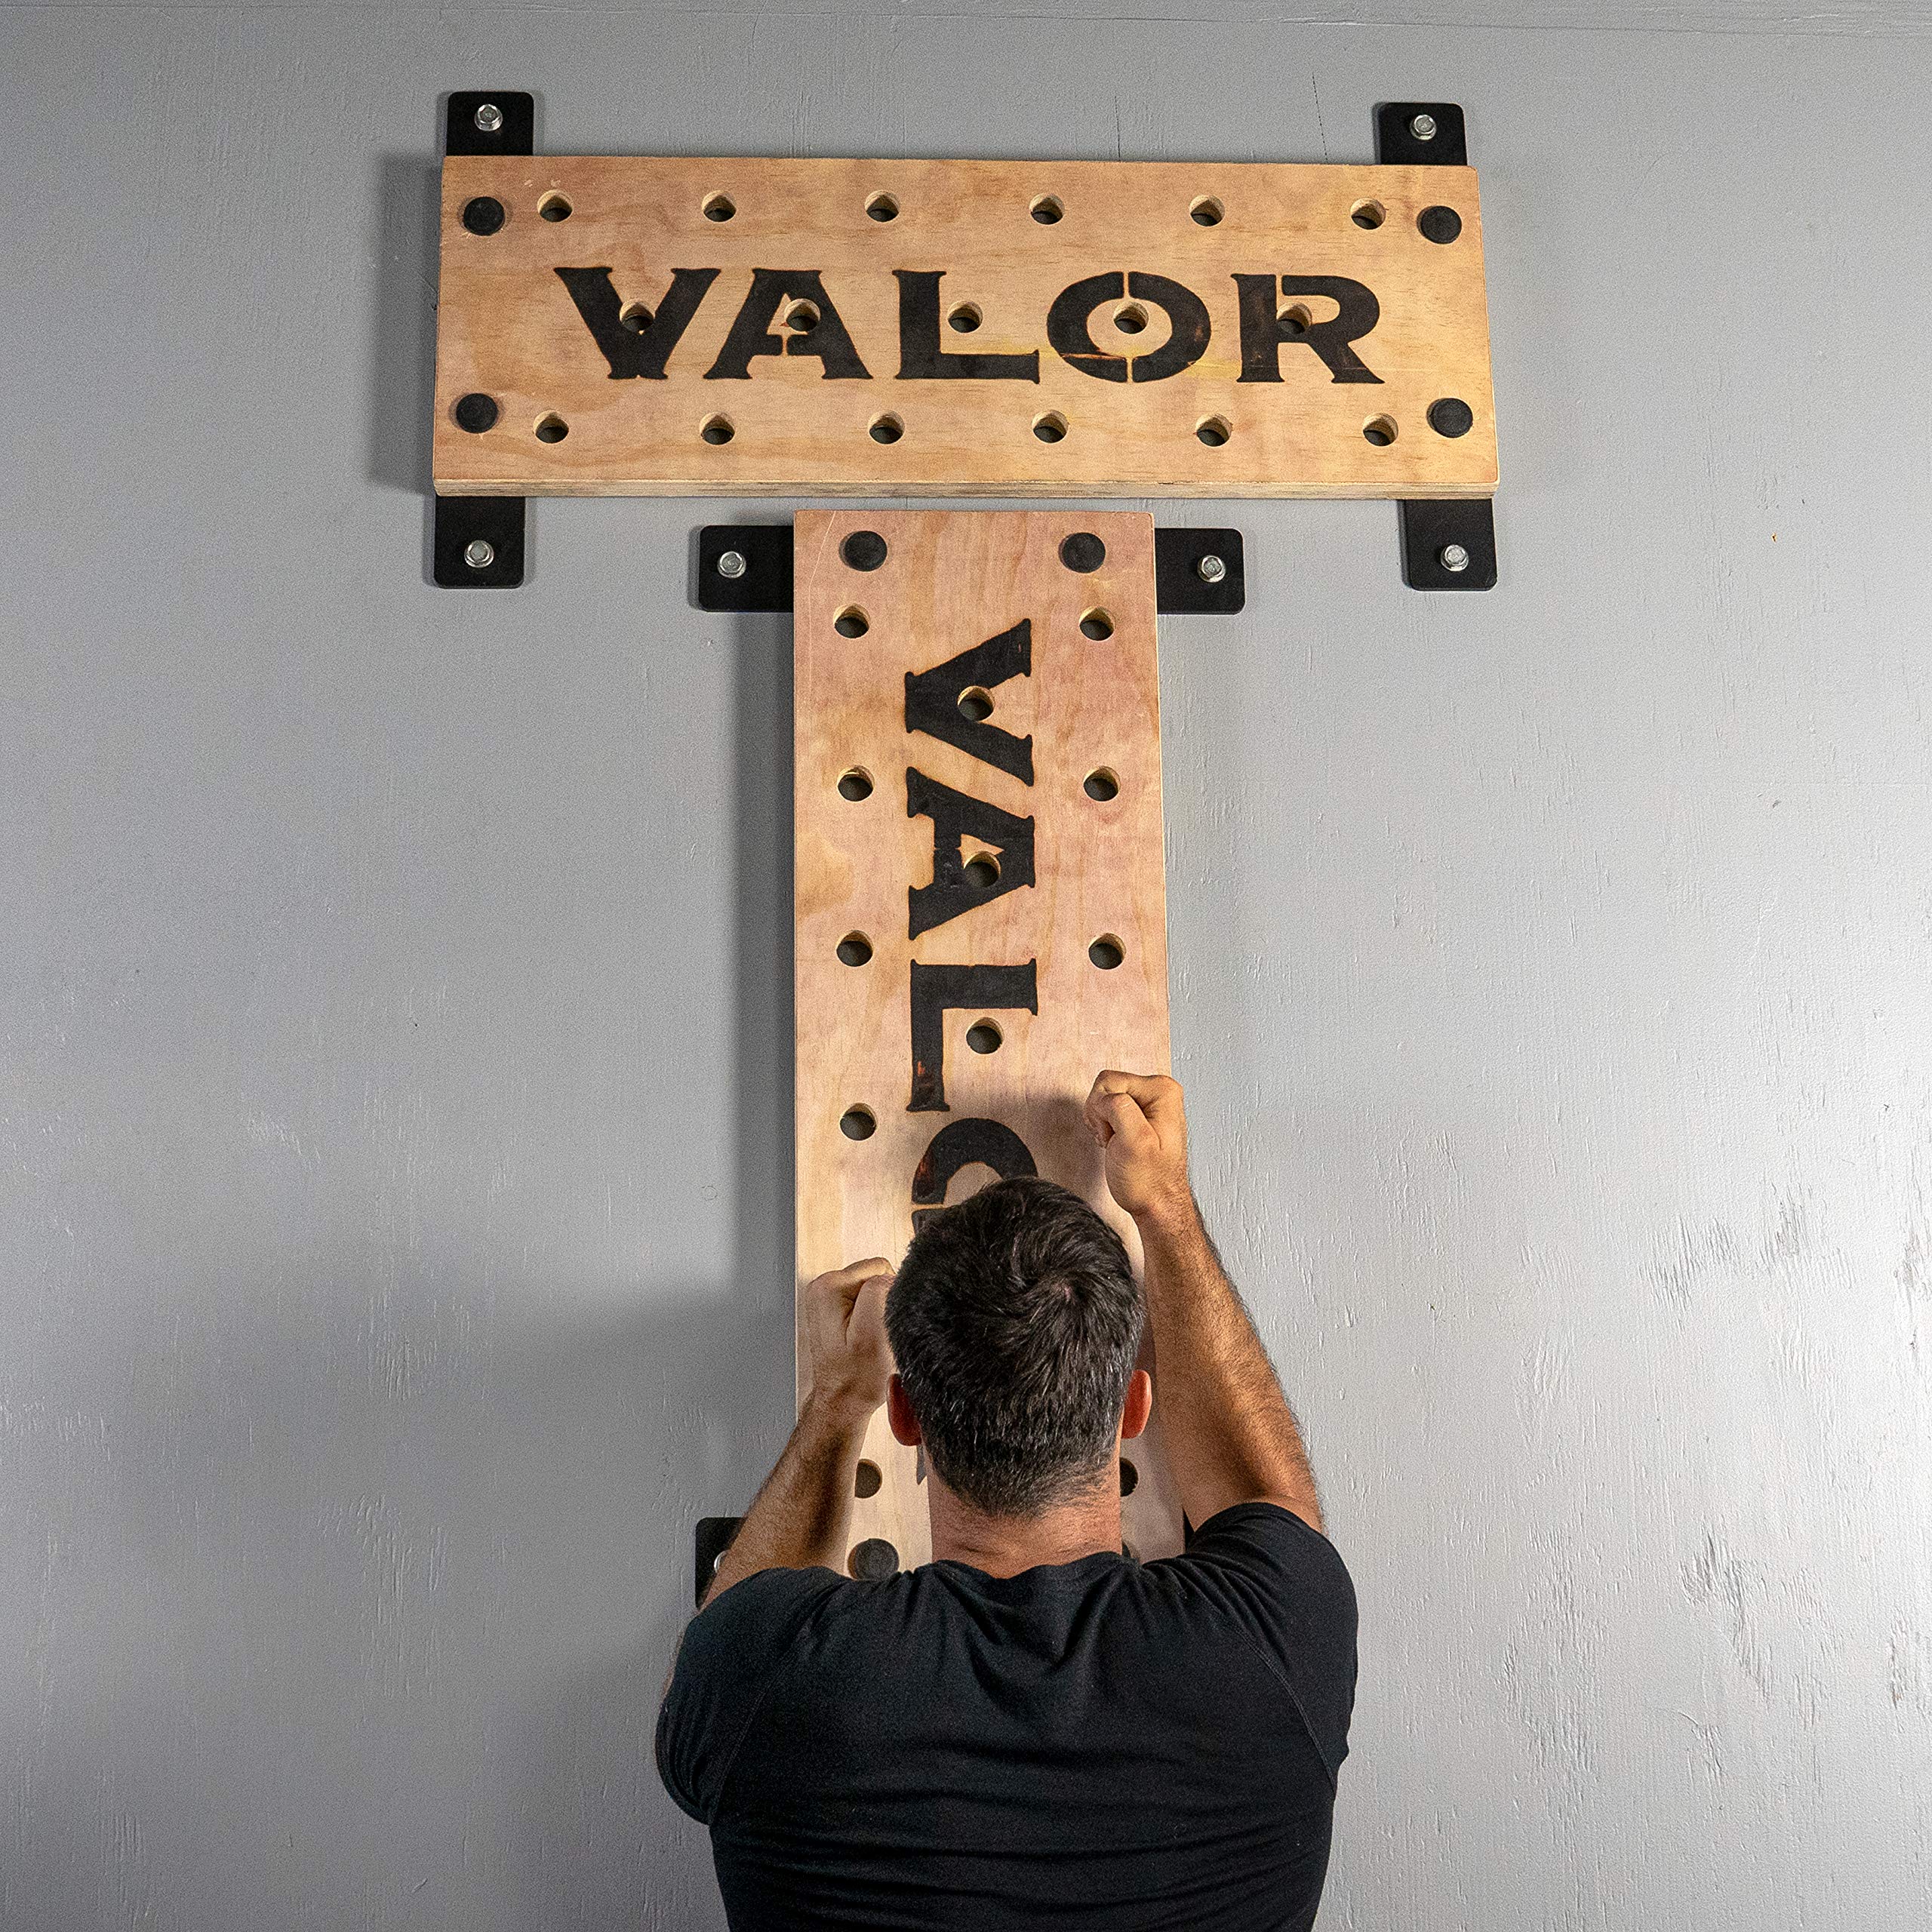
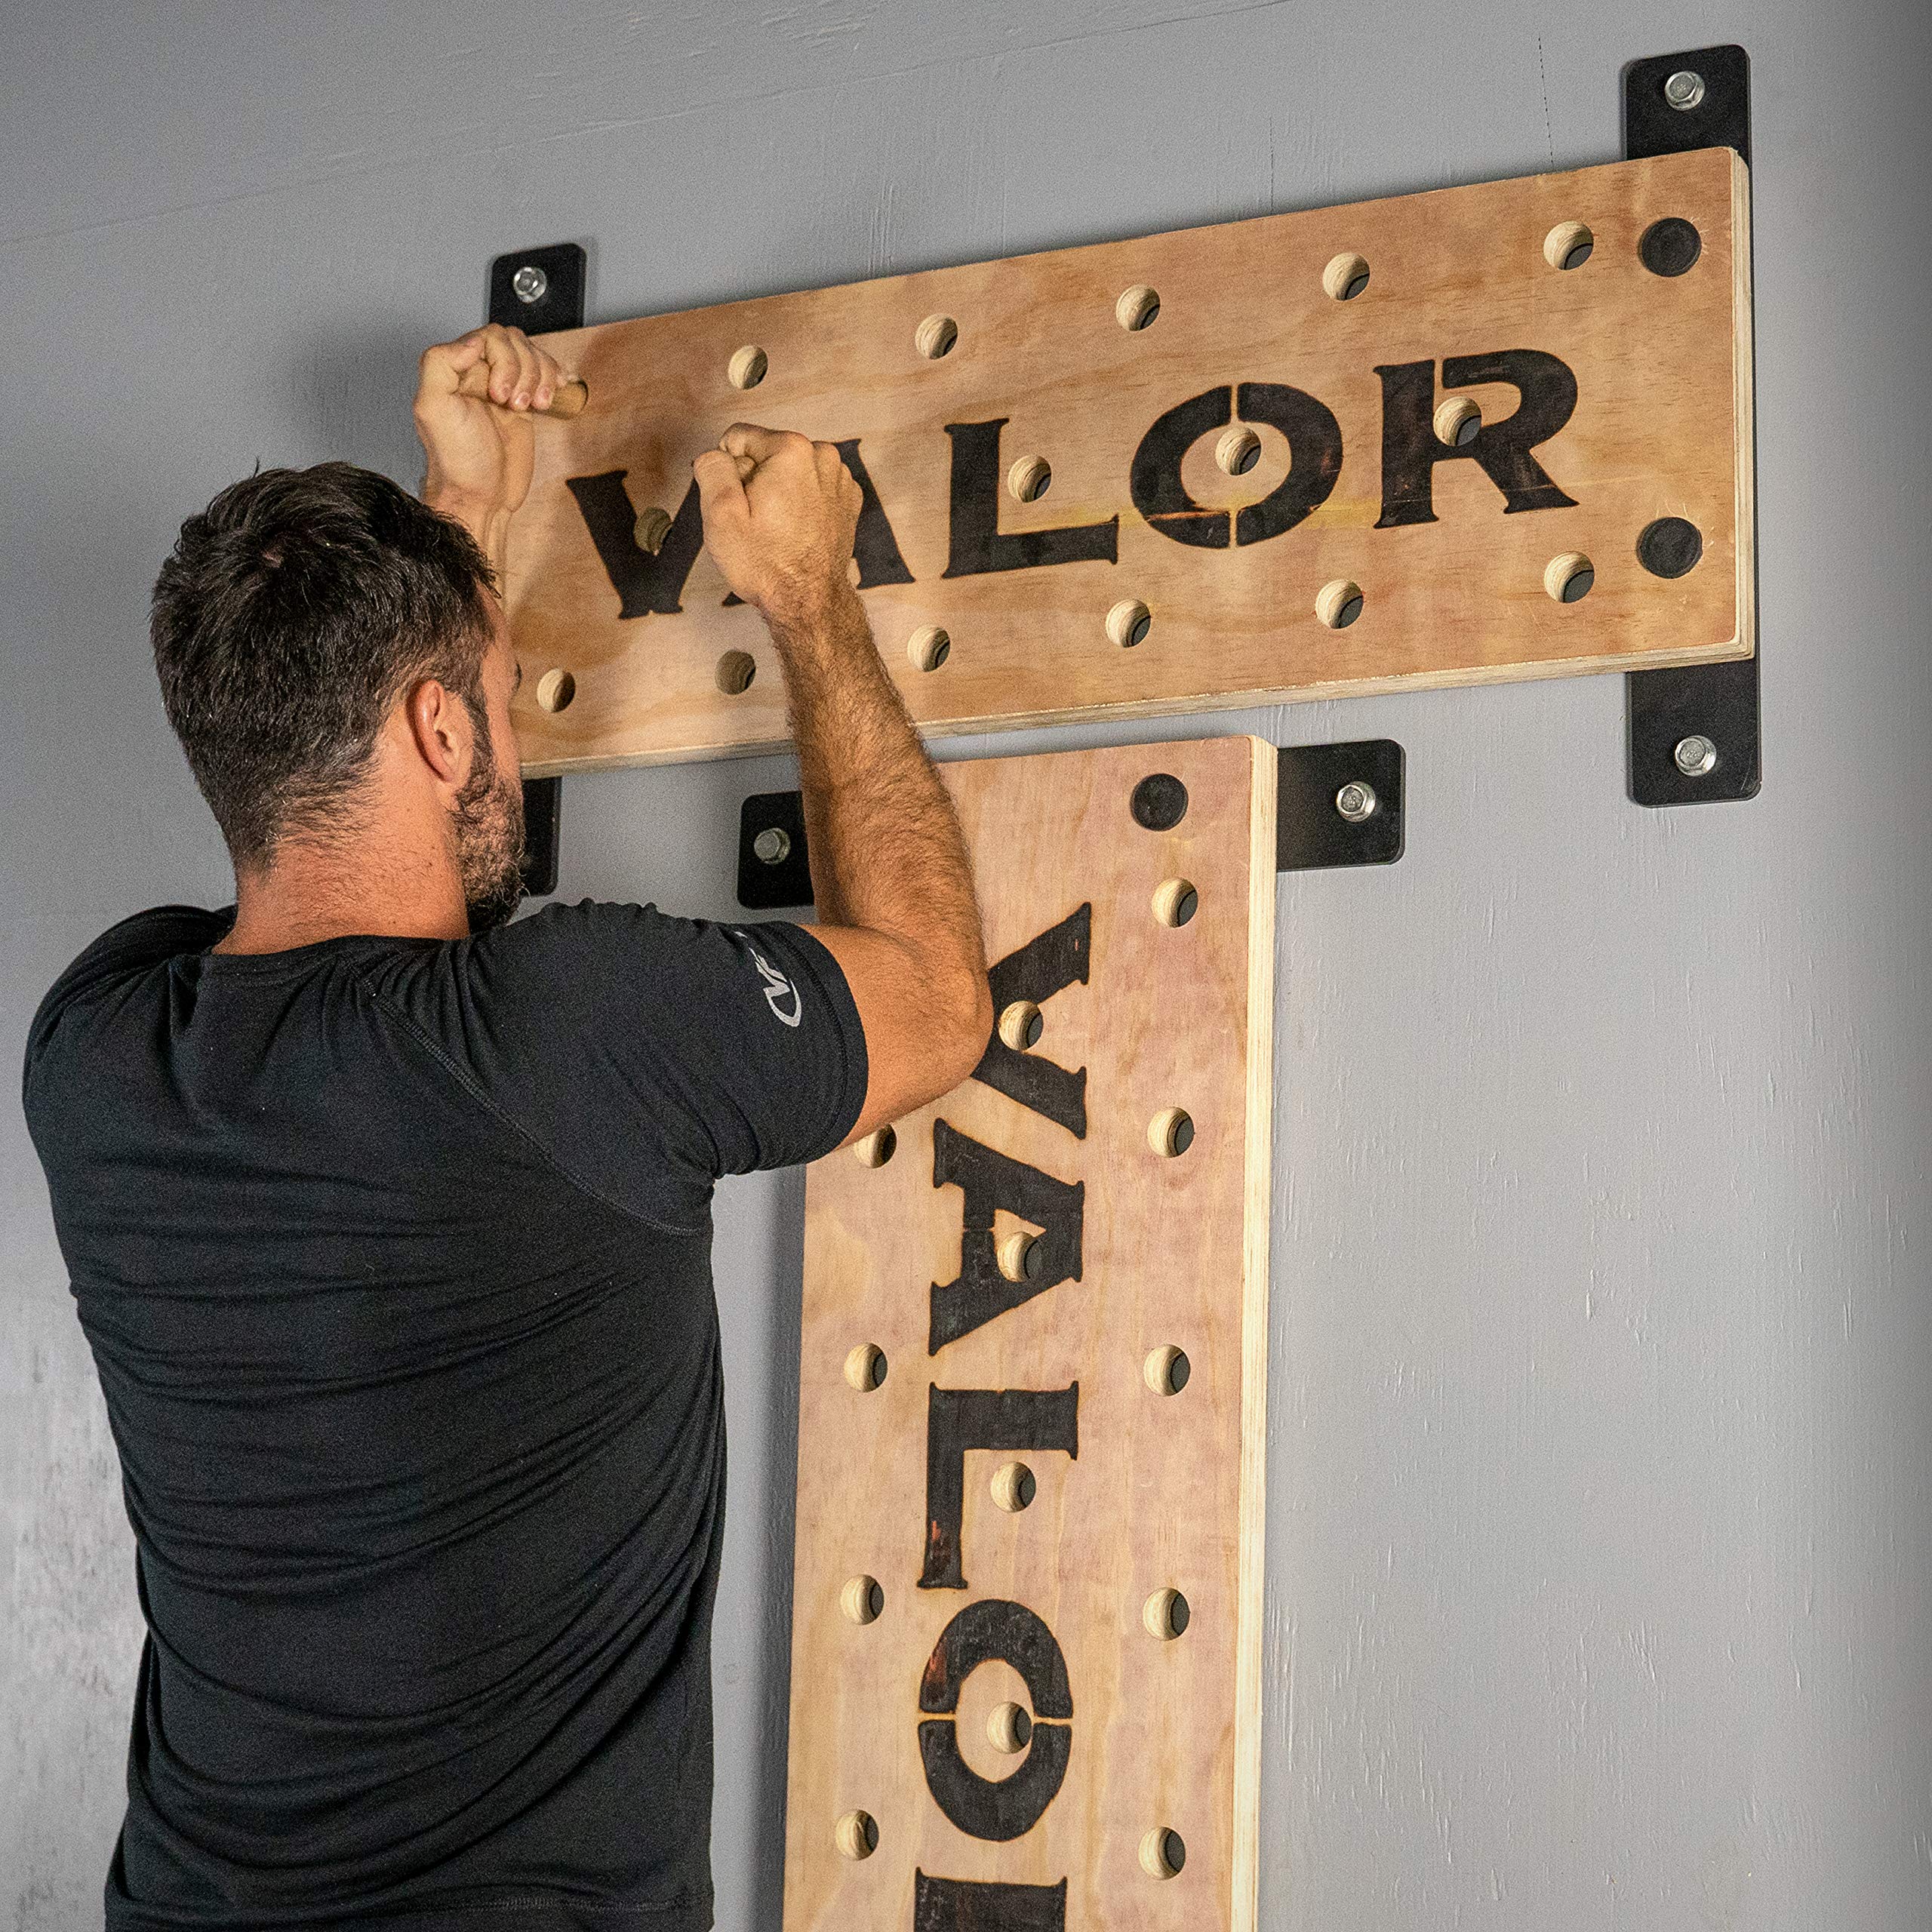
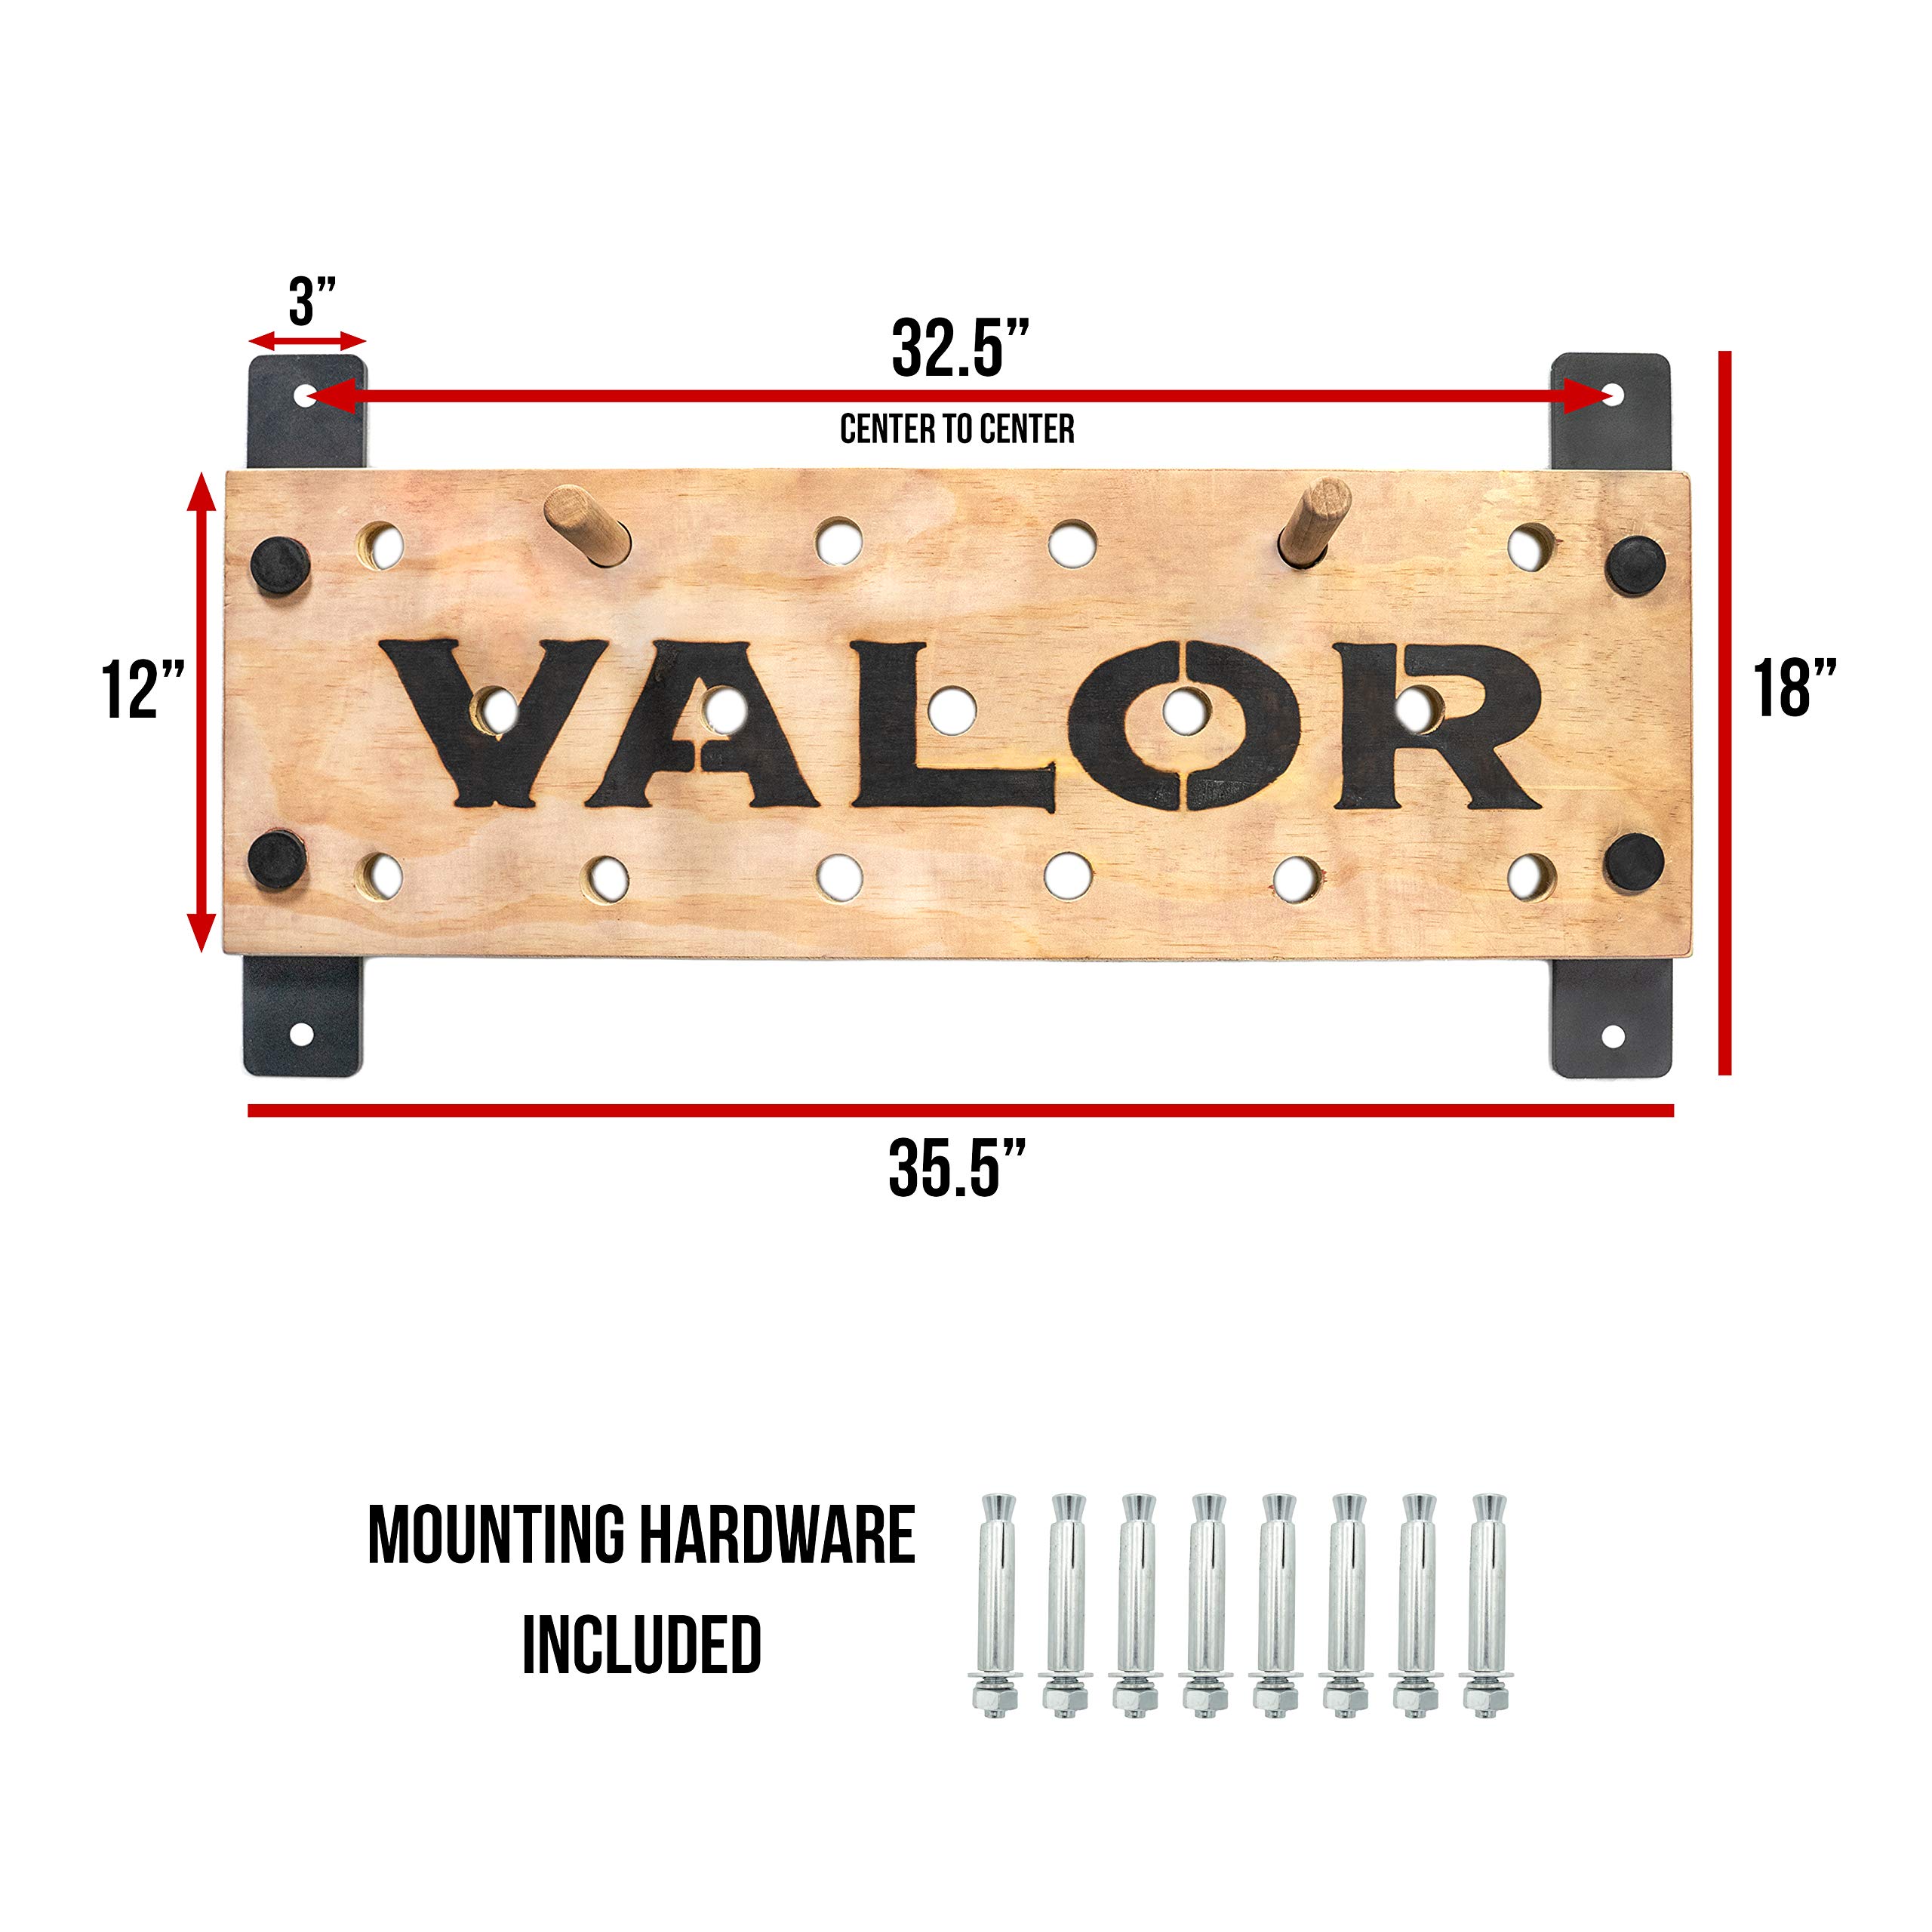
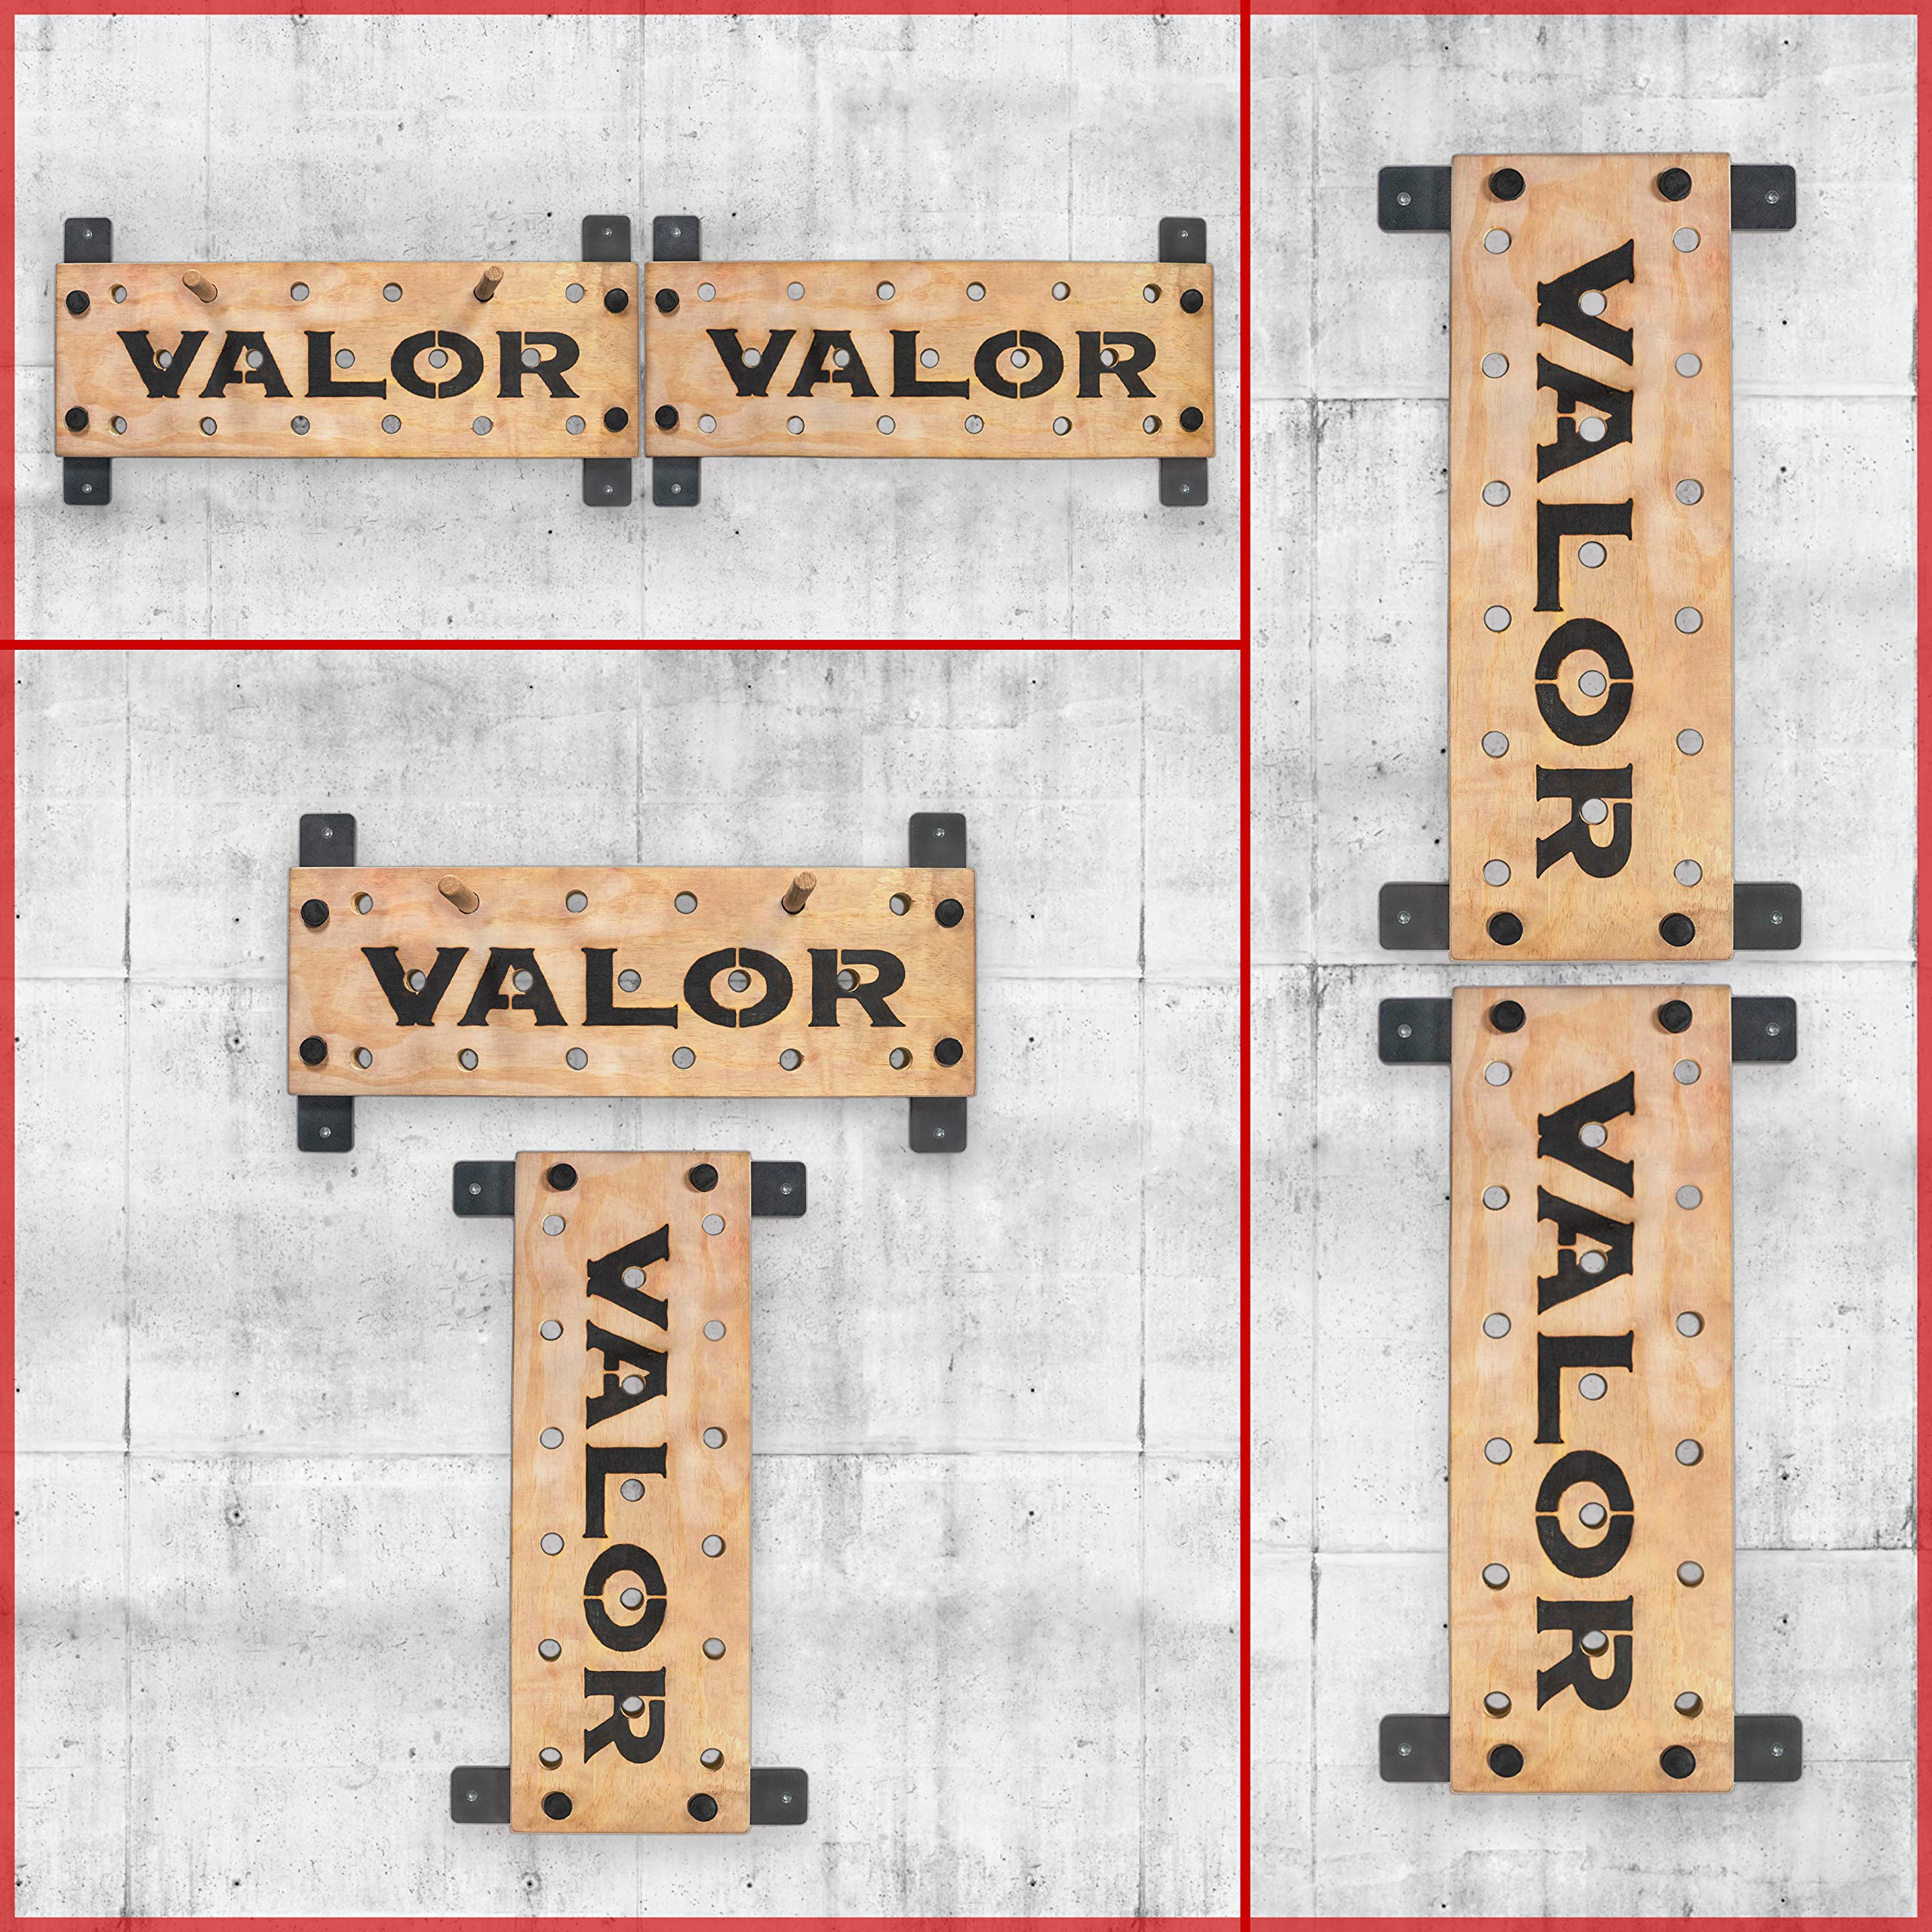
The Peg Board Is Fantastic. Well made and extremely durable.I'm writing this review mainly to help people with the installation process.I INSTALLED MY VALOR PEG BOARD TO (2) WOOD STUDS IN MY GARAGE WALL - Here's How1. Attach mounting plates to peg board. The Peg Board comes with (2) Mounting Plates which will need to be attached to the peg board to begin with. For this, you will need a wrench and a Hex Screw Driver. Once I get home I will give you the right size's of these bits.2. Mount the plates to the studs (AND YOU'RE DONE....EASIER SAID THAN DONE)- Understand that you really need to mount this peg board vertically (if you're going into wooden STUDS in a wall). This is because the mounting plates are 16" inches apart and are made for the standard distance between studs which is 16". If you're mounting into a wooden beam or concrete than you can mount the thing any way you desire. Again this is for people mounting the Valor board into Studs in the wall. SO THINK VERTICAL.- The Peg Board comes with Anchor Bolts which are used to anchor & pound into concrete. So off the bat, you will not be prepared to mount this into wooden studs. Go to the department store & buy yourself: (1) 5/16's Drill Bit - Make sure the bit is at least 3" in length. (4) 3/8's Lag Bolts at 3" Long. (4) Washers for 3/8th's Bolts Or Screw (Doesn't matter). As long as you have a drill and wrench set, you should be good to go from here.- Use a stud finder and locate (2) vertical running studs in your wall you would like to use to mount the peg board. My stud finder locates the center of the stud and it's edges. This is extremely helpful. What I did, was start at the top of the wall, and marked the center of both studs all the way down. I then took a straight edge & connected the dots. I then had two pencil lines running down my garage wall indicating the center of both studs. This makes mounting extremely easy.- GET A FRIEND or GET CREATIVE. I had to lift this monster and hold it in place by myself with the plates directly over the center stud lines I had drawn, in order to take a pencil and mark through the plates exactly where I needed to drill. This is dangerous and stupid. The Peg Board & Plates are HEAVY. Get a friend! Or get creative. You might have a way of holding the peg board in place, in the air or on the wall, without the use of a buddy. Good lucky. I do not recommend it.- After you mark the drill holes, it's pretty straight forward. Drill using the 5/16th's bit 3" into the wood & then use your 3/8th's lag bots & washers, to finally mount the plates into the wall. That thing won't budge after you're done with it.Lastly, good luck...Peg Boards are much harder than they look. I still cannot do a single peg. But hey, if you focus on your weaknesses, you'll become a monster.
T**
Good product but crappy installation
This was a pain in the ass to install. Very vague instructions and the design limits where you can hang it.
A**R
Received my peg board with only one peg and have ...
Received my peg board with only one peg and have not been found the proper size pegs so I can use it
M**H
great company!
Great product. Great service!
A**R
Nice product well made
Nice product well made. I used different bolts to mount it because of where I put it, but it was easy because of the mounting plates provided. I'm sure it will last generations.
Trustpilot
3 days ago
4 days ago
