


Buy anything from 5,000+ international stores. One checkout price. No surprise fees. Join 2M+ shoppers on Desertcart.
Desertcart purchases this item on your behalf and handles shipping, customs, and support to Portugal.
🚀 Elevate your IoT game with the ultimate compact smart cam!
The Aideepen ESP32-CAM W-BT Board is a compact, dual-core 240MHz development board featuring a 2MP OV2640 camera, dual-mode WiFi and Bluetooth connectivity, and ultra-low power consumption. Designed for seamless firmware updates via Micro USB, it’s ideal for smart home and IoT projects requiring a small footprint and reliable wireless performance.


| ASIN | B0948ZFTQZ |
| Best Sellers Rank | #313 in Single Board Computers (Computers & Accessories) |
| Brand | Aideepen |
| Built-In Media | 2 x ESP32-CAM-MB Camera Module, 2 x USB-TTL Serial Adapter Module |
| CPU Speed | 2.4E+2 MHz |
| Compatible Devices | Camera |
| Connectivity Technology | I2C, Wi-Fi |
| Customer Reviews | 3.9 out of 5 stars 675 Reviews |
| Included Components | 2 x ESP32-CAM-MB Camera Module, 2 x USB-TTL Serial Adapter Module |
| Manufacturer | Aideepen |
| Memory Storage Capacity | 8 MB |
| Mfr Part Number | 2_XF01022_US |
| Model Number | 2_XF01022_US |
| Operating System | FreeRTOS |
| Processor Brand | Espressif Systems |
| Processor Count | 2 |
| Processor Speed | 2.4E+2 MHz |
| RAM Memory Installed | 4 MB |
| RAM Memory Technology | internal, PSRAM |
| Ram Memory Installed Size | 4 MB |
| Total Usb Ports | 1 |
| Wireless Compability | 802.11bgn, Bluetooth |
W**W
Camera model not supported.
One set worked and the other did not . I noticed one camera had OV2640 stamped on the ribbon and the other did not have any camera model stamped on it. I tried both cameras on both MB's and the unstamped camera would not work with either MB's. The working camera would not work on the MB that came with the unstamped camera. Please send another OV2640 and MB replacement. Sense my first review I have changed the rating from two to five. The refunded my purchase and I purchased the same items and they all worked as expected.
C**P
First ESP32-CAM unit to buy.
If you are experimenting with video and using the ESP32-CAM AI-Thinkers' you have made a good choice for an introduction to video processing, and you absolutely should have one of these programmer boards. But you should also have one of the cable converters too since you don't have access to the I/O pins with the cam plugged into this programming unit and the cables allow full access. So, buy one, but you only need 1 (one), then all you need is the camera boards. And try the wide angle lenses with the longer cable.. absolutely worth the upgrade. Nice that it comes with a cam but this should really be slated as a starter kit for working with cams. Note: to remove cam, black flap lifts up like it's on hinges, just be careful, and if contacts aren't clean, a pencil eraser works wonders for cleaning contacts.. tip from an old pro. Have Fun - Kent
R**R
Cool idea, but the ribbon cable is far too delicate--Updated 5/6/24, fantastic seller made it right!
I love the idea of this, and for the use intended, the picture quality was fine. But I broke one ribbon cable messing with how to mount that. On the second unit I was far more careful, but the camera went out again when I tried gluing the camera in place. Ended up spending $10 more for a tapo camera, probably should have done that to begin with. EDIT 5/6/24-- Shortly after leaving the review, the seller, aideepen reached out and offered (and delivered a full refund). I got to bump my review up to 4 stars, I wasnt even seeking a refund, just wanted to warn others. If you have a steady hand, and have a good plan for this, give it a shot, just think about securing the camera portion in whatever you put this in.
A**R
Not the same product as two years ago
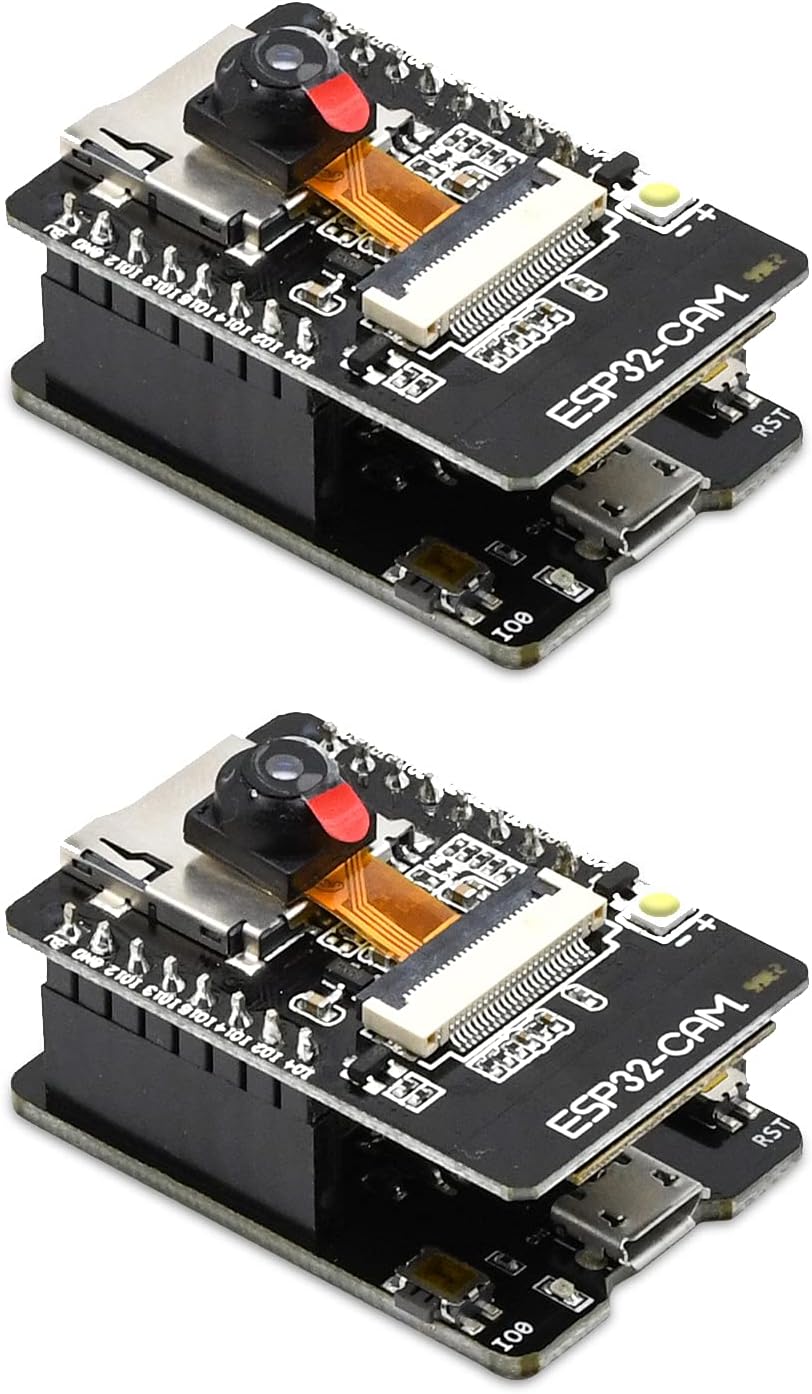
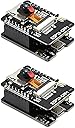
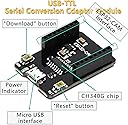
I bought a pair of these ESP32 Cams in April 2022 based on the demonstration at the Dronebot Workshop on Youtube. Those two units worked perfectly and still are performing fine. Now that their functionality has been confirmed, I decided to go ahead a get a couple more because I have additional uses and a friend is also interested. Sadly, I can no longer recommend these devices from this vendor. Although I was able to successfully upload the Webserver sketch for the AIThinker version of the ESP32 Cam just as before, this time the performance is unacceptable on both units. Several phenomena occur. Sometimes, the unit just locks up, not responding to any of the settings or even starting the stream. Since these two units are the third and fourth ones that I have purchased, I'm confident that I'm doing everything correctly. In fact, once the code is uploaded and the IP address is provided in the serial monitor, I tried to "ping" the IP address to confirm that there was a device present. In both cases, the ping was slow and/or non-responsive. Whereas the typical ping time for the other units is typically about 30-50 ms with the previous units, with these two, the pings are hundreds of ms, even over 1000ms. Obviously this causes real problems with responsiveness. (And, yes, all this testing is done with the exact same connection cable, located in the exact same physical location, and connected to the same port on the same laptop.) Based on some of the reviews, I also tried one of the "old" MB boards with the new cam boards. In one case, it made the performance slightly better, but still no acceptable. In the other case, there was no improvement. And, when I reconnected the older CAM to the older MB, the excellent performance was restored. The performance problem is with these two new units. They will have to be returned tomorrow.
H**N
All as expected and more.
Good devices and very good timing in delivery.
P**S
Decent wifi camera at an amazing price!
This was much easier to get up and running than I thought it would be. I was expecting compiling errors and whatnot, but it all went smoothly. I recommend following the guide at DRONEBOTWORKSHOP. I used arduino IDE/code since the libraries seem more robust. The steps are as follows: 1. Plug it in > open device manager to make sure it enumerates correctly as a COM port. 2. Go to DRONEBOTWORKSHOP and follow directions to download correct board settings and libraries 3. Open arduino IDE and select correct board, and COM port as shown in my screenshot. Your COM port may differ. 4. Open sketch "CameraWebServer" 5. Change the wifi settings in the code, near the top. This is your WiFi credentials. 6. Upload 7. Open COM port serial while in arduino IDE, set baud to 115200. I had to power cycle the board before I started receiving correct serial communication. 8. Copy the IP/URL shown in the serial terminal. Paste the address in a browser. I used Chrome. 9. The camera interface should come up. Click start stream and your camera should start producing video. Voila! $10 wifi security camera that doesn't need a subscription, and isn't easily exploitable by said subscription company.
D**N
A good microprocessong board held back by poor manufacturing and documentation.
The boards can work with enough effort, but the lack of any supporting documentation makes this a lot harder then it should be. The programming process itself is fairly easy, after you correctly setup the Arduino IDE, and the USBC port makes that part easy. I setup a copy of the esp32 home project to play with the camera and do some home assistant integration. 1 of the boards I received had a solder bridge on the receive line, and I had to get out a soldering iron to fix it. The onboard antenna is just awful, barely working in the same room as my wifi router. I had to once again get out the soldering iron to switch to a little antenna I had laying around and performance improved remarkably. Went from 30 seconds to load the 1600x1200 image to less then 1 second, and I could actually use it in another room. Additionally the boards I got seem to always enter in the bootloader mode on boot, and I have to press the reset button to get them to run my code. This is extremely inconvenient because any power disruption completely takes the board down. Without any schematics or user guide, it's not really possible to know if this is intended or just another design or manufacturing flaw, or how to easily fix it. The boards do work, and decently well when you get them running, but I would recommend going one of the other boards after the annoyances I had to manually fix.
M**N
Great solution for downloading from usb
I've used eps32-cam modules for years. I've always had to deal with the ftdi serial adaptors which are a real pain. I had to connect 2 jumpers for power and then 5 jumpers for the serial and the jumpers always fell off. This plugs in easily and stays in. Just plug in the usb from your PC and Bob's your uncle. One catch though: The esp32-cam module that comes with it has a different pinout than the traditional ones sold by themselves. The traditional esp32-cam has always been missing a reset pin. This version fixes this by replacing one of the grounds with a reset pin which is great. But it means you have to keep track of which type esp32-cam is which and not mix them. They could have solved the problem of compatibility by reversing the polarity of that reset pin but I guess not all designers are as smart as me. :-)
T**R
Excellent ESP32-CAM Board for DIY Projects
This Aideepen ESP32-CAM board works perfectly for my IoT and camera projects. The build quality is good and the board is compact. Camera output is clear and Wi-Fi connectivity is stable. It supports Arduino IDE easily and is great for beginners as well as advanced users. Value for money product.
J**L
Works well. Good quality camera
The esp32 cam board is good quality. It is easy to flash with the shield and the camera quality is good. I have found there has been a variation for esp32 camera quality. The only thing is that you need to install a driver. The driver that comes with Arduino IDE won't recognise the ftdi chip on the shield. The fix (driver reference and installation) is described in a number of forums and instruction sights.
J**O
Funcionou na configuração de fábrica
O produto chegou funcionando perfeitamente pela porta USB (a câmera funcionando corretamente e com a rede WIFI aberta pra todo mundo acessar), mas após gerar um novo código (no atual arduino IDE) e depois dar o RESET no "ESP32 CAM" é exibido (pelo Serial Monitor ) o erro 0x105 (erro gerado por não acessar a câmera). Não há suporte e nem forum para resolver o problema. Incluindo que não há informações do "Firmware" e a empresa "Aideepen" não está vendendo a versão deste produto.
M**.
Parfait pour les projets de développement en identification d’objets.
Facile à utiliser, conforme à la description. La plaquette USB facilite grandement la tâche pour la programmation. Excellent produit!
K**S
Perfect, as described
Bought these for a near-turnkey use of AI-on-the-edge to read my water meter. Loaded up first try and the specs (particularly the PSRAM) are as described and everything works right away. Highly recommended!
Trustpilot
1 month ago
1 week ago