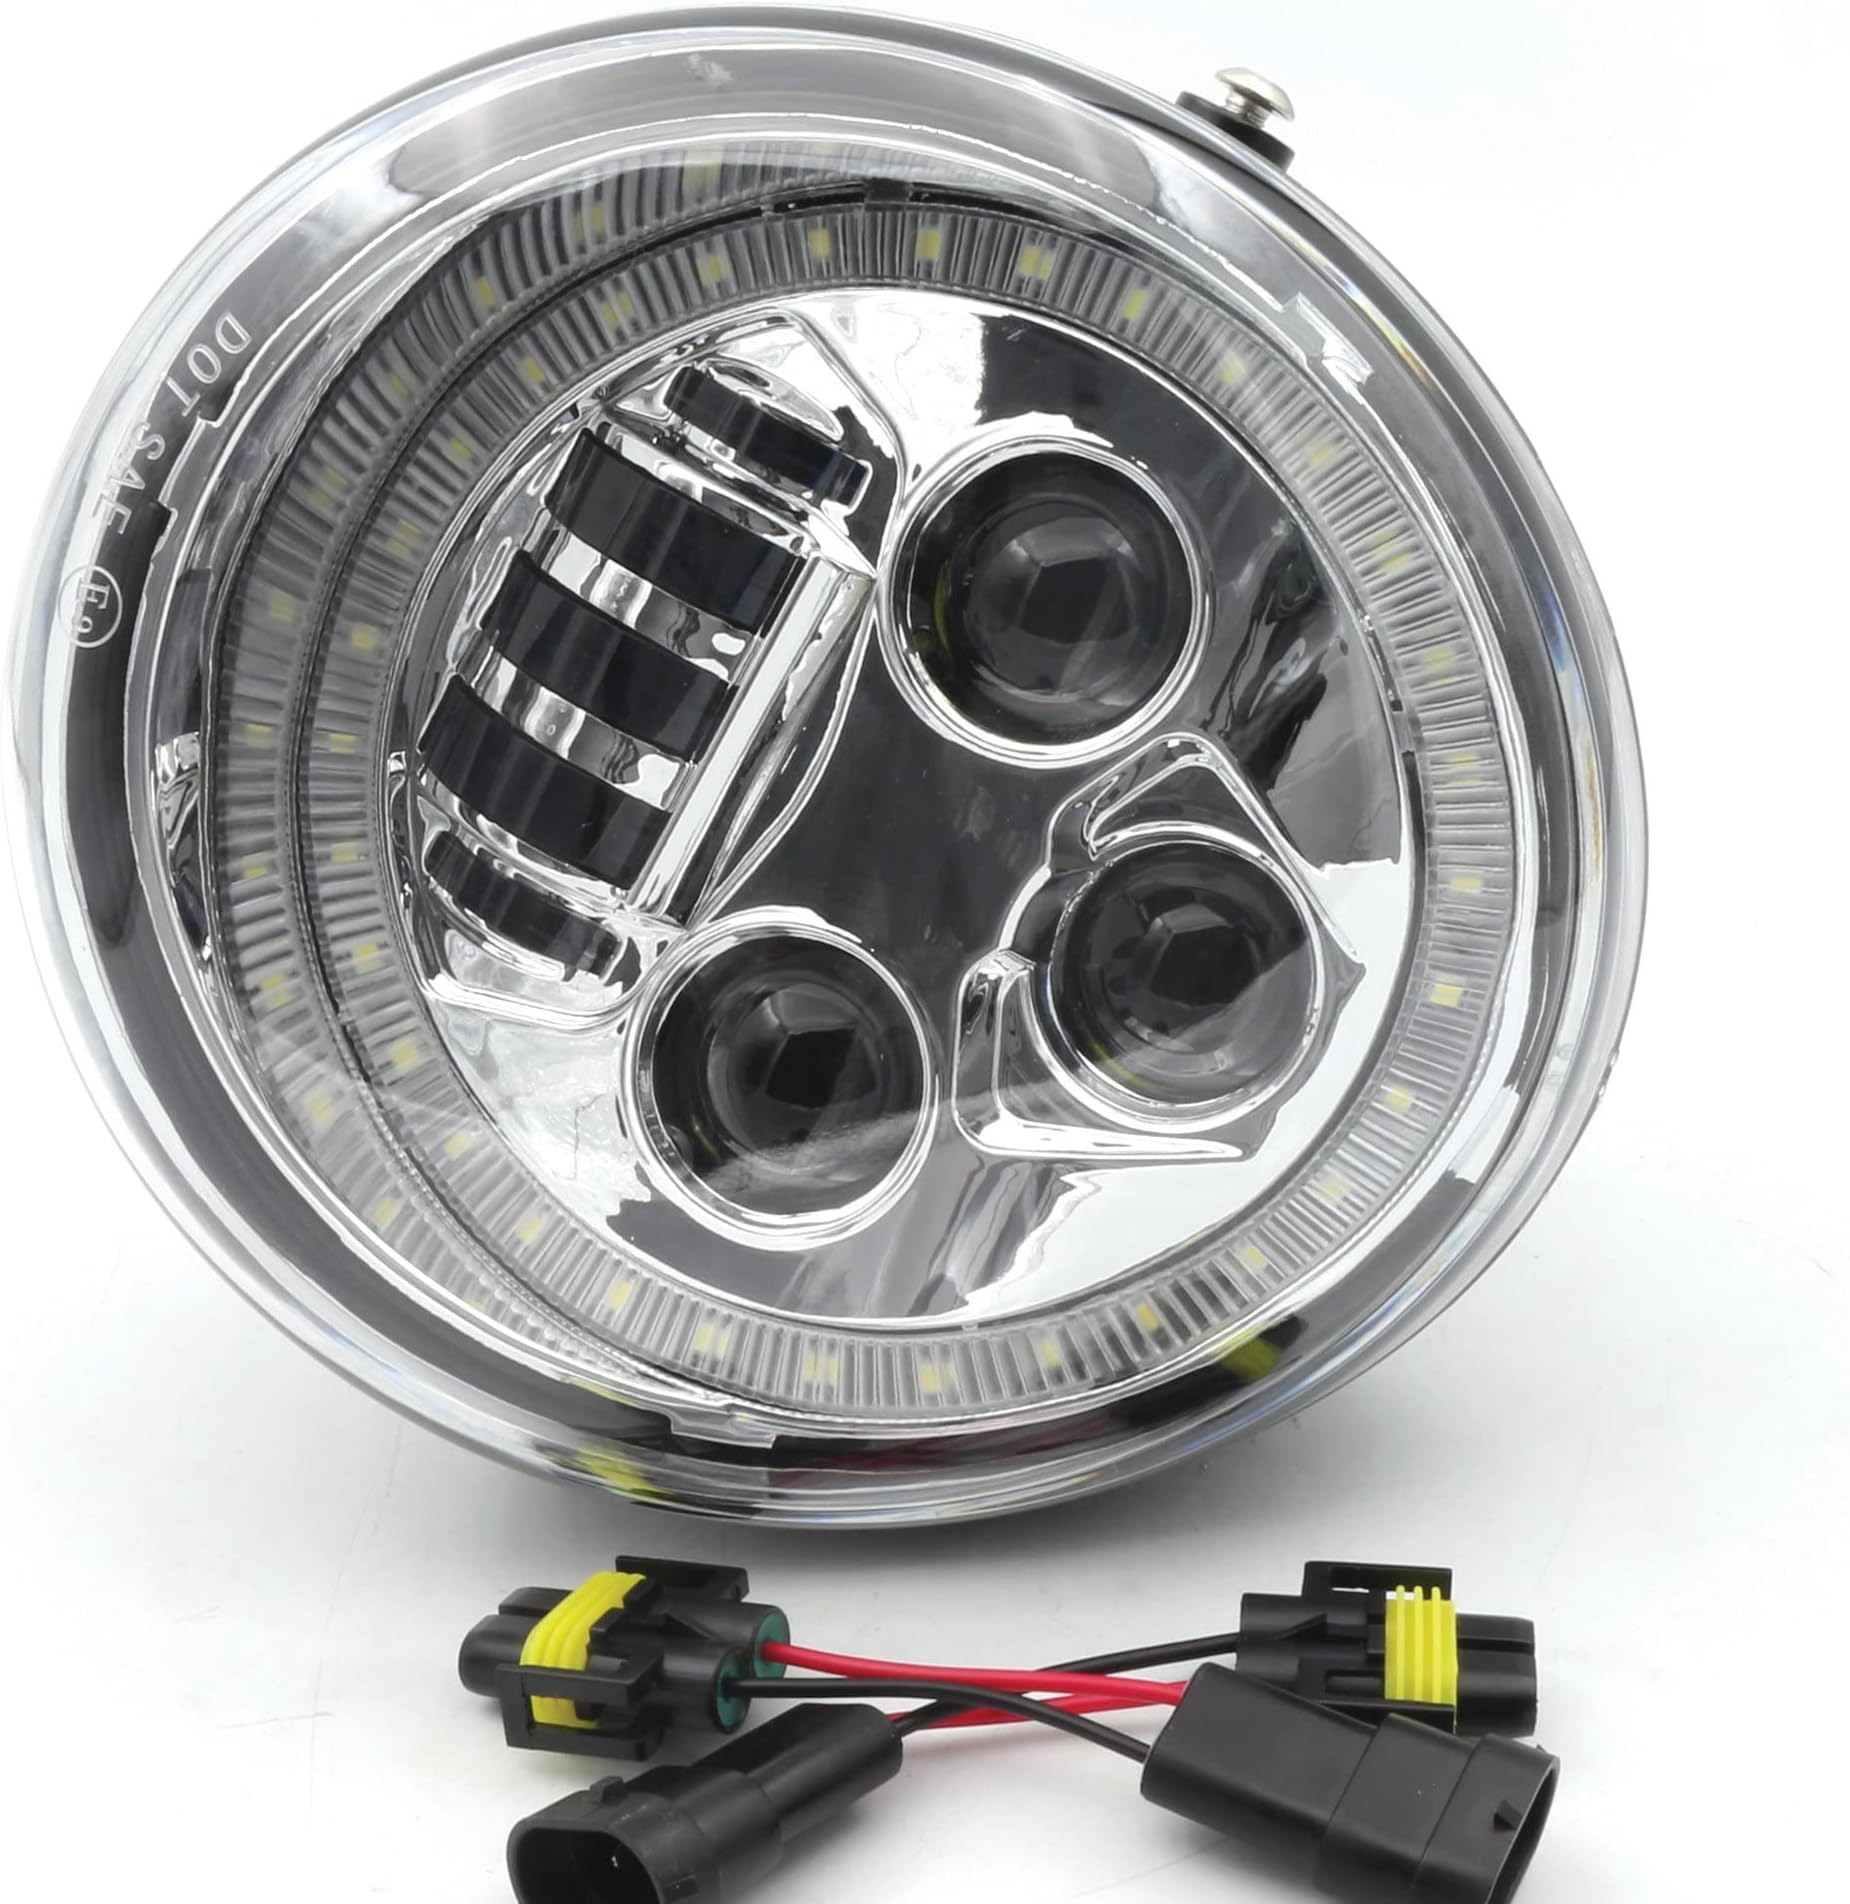
Deliver to Portugal
IFor best experience Get the App
✨ Light Up Your Journey with Style!
The CPOWACE Chrome LED Headlight with Angel Eye is designed specifically for Harley Davidson V-Rod models, offering powerful illumination with a sleek chrome finish. With a robust waterproof rating and a long lifespan, this headlight ensures that you can ride confidently in any weather while turning heads on the road.
Brand | CPOWACE |
Color | Chrome with Angel Eye |
Specific Uses For Product | Head Lights |
Light Source Type | LED |
Vehicle Service Type | Motorcycle |
Special Feature | Waterproof, High Beam |
Voltage | 12 Volts |
Auto Part Position | Front |
Lens Color | Clear |
Lens Material | Polycarbonate |
UPC | 785004503947 |
Manufacturer | Changzhou Powace Internation Co.,Ltd |
Item Weight | 2.62 pounds |
Package Dimensions | 7.68 x 7.56 x 5.28 inches |
Is Discontinued By Manufacturer | No |
Manufacturer Part Number | GY-GJUD-JI |
Special Features | Waterproof, High Beam |
G**B
Works great. I will note you need to remove the ...
Installed on a 2004 VRSCB. Works great. I will note you need to remove the Chrome "eyebrow" off the top of the stock headlight. This leaves a pretty open gap between the headlight and the factory headlight cowl. I will say this is a much safer feeling experience riding at night now. I would estimate the low beam adds 60 degrees of horizontal vision and about 20 horizontal. The high beam is where this thing shines, pun intended. It basically saturates about 160 degrees horizontal and 80 degrees vertical with perfect white light. I feel much safer at night with this light. I will also not that when you do your alignment you should use 2 people.One to stand in front of the bike about 20 ft away and one to adjust. There is an angle which the headlight is too high and is absolutely blinding for other cars. Some think having a light as bright as it gets is safer, but oncoming traffic not being able to see is asking for a disaster. Best money I have spent on a bike upgrade, safety, awesome looks, and gets people asking what exactly is going on with my headlight. And no more bulb changes!
P**H
Exactly what I wanted.
Easy installation. Plug and Play. No directions included, but if you connect it incorrectly the first time....you will notice your fuse has blown. Easy fix if you made this mistake. The light is bright and has a great field of view. I'm 1000% happier with this light over the stock light. Shouldn't take you more than 10 minutes to install.
J**N
Shedding some LED light
I blew one fuse before figuring out what was going on. Here's what I discovered:The reason that you need to get the bulbs working independently first is that if you get the polarity on one bulb wrong with both bulbs connected it will connect 12V to ground through their lamp, blowing the headlamp fuse.Take a look at the photo - there is no magic electronics inside the connector cable. What does it do then? Note that the end that plugs into the Harley harness is keyed, and keyed differently to the pigtail from the lamp, so in principle it just swaps 12V and ground. However: - Chance for a Short - Note that although it wont push all the way in when the key is not aligned with the slot it will make contact, potentially blowing the fuse. - Chance for a Short - Note also that the end that plugs into the pigtail on the lamp is NOT keyed so if you don't connect red to red (lamp to connector wire) you will again likely blow the fuse.A few other things: - 60 Watts at 12 volts means that the headlamp will now draw about 5 amps. - With HD you get either one bulb or the other. It seems to me that with the LED lamp main beam will also light the regular headlight LED's. - I used a zip tie to keep any strain of the wires from the lamp. - It's a sweet looking lamp, especially on my black/chrome VROD Muscle:) - It's BRIGHT:)
S**1
I see the light
I bought this LED headlight to replace the stock headlight on my 2004 Vrod "B" model due to the low beam reflector inside the light breaking off and no way to replace it.After removing the stock headlight, installation of the LED light took about 20 minutes. The installation instructions are pretty sparse but are all you need. My installation required the use of the included adapters. I did blow a fuse when switching from low to high beam. Please make sure you have a few extra 15 amp "mini" fuses on hand incase you blow a fuse.I was concerned the light has a black backing and would look out of place on my bike as the stock light had a grey/silver backing. The black actually looks really good on my bike with a black frame.The light is noticeably brighter than stock. I personally don't care for the look of the LED when the bike is turned off but love the amount of light produced when turned on.
N**M
NOT ALL ITEMS IN PACKAGE
I received my package and was told this is a plug and play headlight. I’ve plugged everything in and nothing would turn on. Not even the bright lights. I checked my fuses. My light fuse was blown. I got a new fuse and now the only bright lights work. The running lights or low beam lights are not. I was told to connect the patch cord(which was not included) ,the white cord, so I’m stuck with no running lights on the bike. Please check and make sure you receive all of the components in your package.
S**
2013 VRSCDX Install
2013 VRSCDX install: Light was pretty much plug and play. Wire harness matched up well. Didn't blow any fuse going from low beam to high beam. Wiring part was very simple. However, mounting the light to the original VRSCDX mount was extremely frustrating. The washer that came with the light to mount was very difficult to insert. After adjusting the washer to fit perfectly between the light and the mount and screwing both screws in, the light was loose. It did not sit tightly to the mount. After a trip to Auto Zone and Lowes, I finally found some washers small enough to fit into the mount but diameter of washer wasn't wide enough to fit the screw. Did some modification to the washer and finally got it to fit. Had to use 2 washers on each side for the light to sit tightly on the mount. What was suppose to be a simple 30 minutes installation turned into a 3 hour installation.
V**T
Happy illumination
Definitely worth it. I am Impressed with the brightness.I would recommend at least give it a shot. Instructions should have been given little more detail but I am happy with the product. I had to read the instructions few times to fully understand. Just an fyi, if you put the connection wrong you will end up with blowing up the light fuse Which is not difficult to replace but just a heads up.
G**R
Excellent quality.
Excellent! Nice!
Trustpilot
3 weeks ago
1 month ago