Desertcart purchases this item on your behalf and handles shipping, customs, and support to Portugal.
๐ฆ Cut smart, mount sharp โ the ultimate fixture box for pros who demand precision.
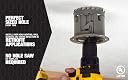
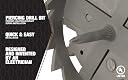
The Southwire MSBST250 Smart Box Shark Tooth combines an innovative integrated hole saw with precise location accuracy and robust mounting support. Designed for surface-mount installations, it effortlessly cuts perfect holes without extra tools and supports fixtures up to 6 lbs. Ideal for professionals seeking efficiency and flawless finishes in electrical box installations.


| ASIN | B077D92HMQ |
| Best Sellers Rank | #2,490 in Tools & Home Improvement ( See Top 100 in Tools & Home Improvement ) #74 in Hole Saws |
| Brand | Southwire |
| Brand Name | Southwire |
| Color | Gray |
| Customer Reviews | 3.8 out of 5 stars 1,174 Reviews |
| Finish Type | Matte |
| Global Trade Identification Number | 00784297023101 |
| Included Components | Fixture and Ceiling Electrical Box Smart Box Shark Tooth with Hole Saw |
| Installation Type | Surface-Mount |
| Item Type Name | Shark Tooth with Hole Saw |
| Manufacturer | Madison Electric Products |
| Material | Polycarbonate |
| Model Number | MSBST250 |
| Number of Items | 1 |
| Part Number | MSBST250 |
| Style | Shark Tooth |
| UPC | 784297023101 |
| Unit Count | 1 Count |
L**H
Clever idea, works great.
I bought some of these to test. Seemed like a great idea except plastic teeth. After looking at the teeth, they are sharp and cleverly set at different angle to cut well, but clearly are thermoplastic, can't get them hot. No worries, I just used a ratchet and socket and turned slowly. Maybe it took a minute longer but I didn't have to figure out where I left the socket crossover to a drill. I cut one hole and the teeth were OK, plus the box slid right into the hole, slick and simple. The hole was so nice I went ahead and fitted a different box with the same OD. No problem, worked great. Curious, I cut another hole with the same teeth. Here is a picture after cutting TWO holes. I could use it again, but I only bought two boxes, and don't need more holes right now. I noticed the biggest problem was the hardcoat and paint. If I wanted to cut 3 or 4 holes, I'd simply score the hard surface away with a knife first. The flange on these boxes is pretty wide, it would cover a bit ot error. I'll never buy any other type of box, these are MAGIC.
L**D
Gets the job done! Hereโs some instructions...
I bought the Smart Box after viewing a demonstration video and I thought to myself, โgreat! I wouldnโt need to buy (another) hole saw. (I had lost two before ever using them.) The video was helpful. However, it didnโt mention the teeth could actually skip across the wall leaving a clawed arc if youโre not gripping your drill tightly! Tip your drill slightly and hold on tight, then straighten to cut directing into your wall or ceiling. The hole saw will make a perfectly round plug. Donโt take your time cutting your hole as the plastic (or resin) Shark teeth on the hole saw will wear down before you have finished cutting your hole. My Smart Boxโs cutting teeth wore down so much it could not cut completely through the drywallโs backing, so make quick work of your hole. I only wished there were instructions on how to easily (or properly) remove the tabs for the wires and install the box. I banged mine up pretty well. The best I can explain is that after removing the cutting bit, bust through one of the tabs along the back or bottom of the box. Bring your wire through the hole box then slide your box into its hole. (It will be a snug fit). A little wiggling and rocking while push will help. Make sure you position the hole you made in the box so that it faces the direction from where your wires come. I used an old work box so it was important to know this before inserting the box as the wires bundled in the wall seemed to dictate how I was going to manage to pull any more wire out after I installed the box. The box has a flange so insert it until the flange is almost against the wall or ceiling and turn the 3 mounting screws until they pull your box completely into its hole, or until the flange is tight against the wall or ceiling. I guess I should mention you should also be mindful of a vapor barrier. I accidentally tore a little hole in ours when I knocked the hole thru the drywall backing when the Shark Tooth hole sawโs teeth wore down. I used the Smart Box to install a wall light in my kidsโ bathroom. I had replaced their light when I discovered there was no work box behind it. Just wires capped off and shoved into a jagged hole in the wall. I figured I should bring it up to code and raise the light since it was considerably larger than the original. So large it hung in front of their bathroom mirror. The hole the Smart Box hole saw made left me with a plug that perfectly fit the gaping hole left by the builder. The 3 mounting screws secured the box firmly in place and provided the much needed support for their large wall light. A fire hazard was quickly mitigated! I wanted to use a Smart Box again when I move a light fixture in my kitchen, but wouldnโt you know...one of my hole saws showed up! Lol
C**A
Teeth will burn!
Do not buy! The teeth are made of plastic and will burn up when drilling. Could not complete installation because all the teeth burned up and then you have to deal with the smell of burnt plastic. Save yourself the headache and just cut the hole with a regular saw
L**N
Nice box, but can't get all the way through drywall with cutter
I had read other reviews about how the cutting teeth can't make it through drywall. Some said that if you take it slow it will work fine. When I received it, the teeth were very sharp and the plastic seemed very sturdy so I thought it should work with no trouble. I drilled the hole slowly with very little pressure. Sure enough, about halfway through it quit advancing and I saw that the teeth were gone already. The teeth do make a nice hole through the first paper layer, so it is easy enough to finish with a utility knife. I was very happy with the electrical box though.
L**G
Good idea, half performance
It is a good idea. But the saw/drill did not work. It was unable to drill the hole in the ceiling, only scratched about 3 millimeters or 1/8 inch. I had to use a saw to cut the ceiling drywall. The box worked fine. Overall it is easy to install, but you do need a saw to do the cutting job.
M**R
Great well made product.
This is a must-have tool. Very clever and well-thought-out design. It worked perfectly for cutting the opening for a light fixture and made the job quick and clean. The plastic guide pieces are especially smartโI only wish it were possible to order those separately and reuse the saw, because that would make this even better. Overall, this is a great product and absolutely worth it. Highly recommend.
K**P
Poor quality of cutting edges
This is a great idea in theory. However, using it on my ceiling that is skip trowel textured and painted, the pilot hole bit and the shark teeth just melted away and started flinging hot bits of molten plastic into my face on the first one I tried. I used a metal drill bit on the second one to set up the pilot hole, which worked fine, but as soon as the shark teeth hit the drywall, I was able to maybe go 1/8" into 5/8" drywall before the teeth melted and started burning the hole. It just self destructed. I had to finish both cut with my oscillating saw. The unit itself works great as a remodel box, and it created a nice round hole for me to use as a semi pre-cut hole for the box. But not worth the money just to have to cut the hole myself with another tool. I would not buy this tool until they figure out a better drilling and cutting edge.
J**E
Wow, these things are cool and work as you'd expect
So I went into this not knowing I'd be doing my own electrical and hanging my own pendant light over the counter. This was really easy to use, I made a hole beforehand in the middle, then put this in the spot. Added a socket extension to a drill with an adapter and went to work. This bites in hard and you're gonna need a drill or impact that has some guts, I had to swap to a brand new battery to have enough juice. It also pulls the drill from your hands a bit. Once the hole is made, a few of the teeth were bent, bu that didn't matter, you take them off, put it in the hole and tighten the screws. It is very sturdy and holds a fixture without issue. I think it holds more than stated, but don't take my word for it.
G**.
GREAT IDEA
GREAT IDEA AND WORKS WELL
R**Y
Worked perfectly.
These worked exactly as advertised. I had great success going through 1/2 drywall. The cutters do wear as they cut but as long as you go slow with proper pressure itโs works perfectly. Will buy this style anytime I need
D**N
This works okay
The teeth do wear down quickly. Use a normal drill. I used my cordless impact to drill slowly but it caught enough resistance to start impacting. That removed the plastic hex nut before I could finish so I had to use my hole saw. Totally my fault but no issue. Removing the tabs for wire pass through was a pain but doable. Install was painless and quick once the hole is cut.
G**R
The cutting teeth do not work properly.
The cutting teeth melted down to nothing and I had to finish the hole with a drywall saw. I drilled slowly after seeing some of the comments, hoping it would be ok. It was NOT. Do not buy this product.
A**.
skip the built in hole saw
the built in hole saw was garbage and broke in 30 sec. the rest of the junction box worked well
Trustpilot
3 weeks ago
1 month ago