Description
🔪 Sharpen Like a Pro, Slice Like a Boss!
- BUILT TO LAST - Crafted from premium aluminum alloy for unmatched durability and longevity.
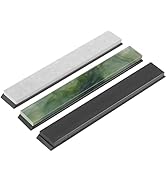
- TRIPLE GRIT POWER - Coarse, medium, and fine diamond plates restore and polish edges to perfection.
- PRECISION PERFECTED - Engineered components guarantee razor-sharp accuracy every time.
- EFFORTLESS SHARPENING - User-friendly angle adjustment and pressure control for pros and beginners alike.
- ALL KNIFE COMPATIBILITY - Sharpen everything from kitchen to hunting knives with one versatile system.
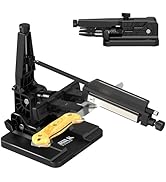
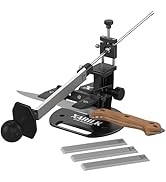
The GEN3 Guided Knife Sharpening System by XARILK features precision-machined aluminum construction and three diamond grit plates (320#, 800#, 2000#) to restore and refine blades with professional accuracy. Designed for versatility and ease of use, it sharpens a wide range of knives from kitchen to outdoor, ensuring long-lasting durability and superior edge performance.