F**Y
Simple process BUT requires a little education before attempting...
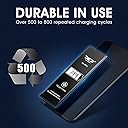
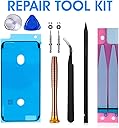
This product is sold by people whose native tongue is not English. The instructions provided are good but it is very helpful to SEE the process. There are plenty of videos out there to show that but I think Scandia made the best one. Some things to emphasize:1. Pay very close attention to what screw comes from what part of the phone. There are subtle differences between them and if you confuse them, no telling the result. I put a sheet of paper down marked with lines separating the various parts from one another by major step in disassembly (case, screen, battery) and laid the parts (screws and covers) for each in a zone marked off for them. I pre-set this paper AWAY from my work area a foot or so so as not to disturb the parts.2. This is a complicated piece of electronics you are working on. So, work in an uncluttered area free of electro-static shock like stay away from a carpeted floor.3. Have plastic tools IN ADDITION to the tools that are provided and are beefier than the ones in the kit. I have tools used for removing plastic parts (sold at any auto parts store and handy for other jobs like this one) in cars like door panels and dashboard pieces. These do not gouge things as easily and do not conduct electricity. I used at least two different plastic pry tools to remove the battery per the next step.4. Using a hair dryer or hot air device makes removing the battery from the adhesive the holds it MUCH easier. Not too hot, but heat it little, pry a little, hit it with more heat and pry, heat and pry. The heat should be applied to the case not the interior components lest you melt them. And aim the heat at the case where the battery is. DO NOT do this part where you have all your intsy bintsy parts or you will BLOW THEM AWAY and life becomes depressing.5. Per the Scandia video, know where and how to pry up the battery. Do not bend any part of it to dramatically lest it crack or more. Just pry a little all along the case edge starting at each corner being careful to not hit any ribbon connectors. Heat the back up again as things cool and continue prying from each corner little by little. It took about 3 minutes for me to get the battery out.6. I was able to get the battery out this way and leave the factory tape in place. Before you put the new battery in, compare the connectors to one another to be sure they are the same. Once confirmed, the new battery drops easily in place in the little cradle made for it.7. Finally, dont be in a hurry. Move methodically, carefully. Review the video any time you do not know exactly what to do next.8. When it is all back together, hit the on button and pray. When the apple shows you are home free.Have fun!
L**Y
Great battery easy to install.
First thing you need to do is check your model number in settings, general and about phone. Make sure your ordering the correct battery.Here are some installation tips. When you're taking out the old battery make sure you pull the tape strips out away from the phone parallel to the ground do not pull straight up or they will break and it is extremely difficult to get the battery out. When you're putting the new tape down it's much easier to stick it to the phone first and place your battery on top of the tape. Make sure the blue tags on the end of the tape are facing up towards your battery. You want the big ends of the tape to stick to the battery end and not your phone. It's also much easier to connect the new battery before permanently sticking it into your phone. I didn't do this and I thought I ordered the wrong battery because the connector is hard to get just right to snap in. I ended up having to push the connector towards my battery to get it to snap in right. remember when putting the connector cover back on, the little screw goes towards the edge of the phone and the bigger screw goes closer to your battery. There is not a alcohol wipe included to clean your screen you can use rubbing alcohol for this the higher the alcohol the better.I've done a lot of replacements for Android and iPhone this is a good quality battery. The pick is exceptional. it has a thick circle in the center of the pick and it makes it easier to use not only to pry up the screen but to disconnect ports as well it's one of my favorites.If the tape brakes when you're removing your old battery please look up a YouTube video on how to safely remove your battery when the tape breaks. The adhesive tape is really strong and you will most likely damage your phone trying to pry the battery out.Great quality repair kit I would recommend to anyone.
M**A
Easy install, no adhesive strips nor wipes?
Photo/ad shows both wet/dry wipes and adhesive strips - neither came in package (lack of wipes didn't bother me to much, however). I had to go searching through an oven of a garage (93° outside so a closed garage was HOT) looking for a window insulation kit that I knew would have very thin 2-sides tape to install the battery with. Showed 52% charge when powered up and currently 58% power now, which is about 15 minutes later. Only gave 4*s since it did not come with everything shown.
E**N
Awesome iPhone 6 battery replacement
Apple customer service told me to go purchase the battery at an Apple Store for $49 & they confirmed twice that I could install it myself at home, as I desired. I get to the store and they want to setup an appointment just to diagnose my old phone, with first available appointment was a one-hour wait time. I told them I only wanted to purchase the battery (as I 100% knew that was the issue) for my old iPhone (no thanks to Apple updates draining battery life on older phones) and that Apple customer service told me I could purchase the battery and install it myself. They tell me that’s not true. The Apple store tells me I cannot simply “purchase” a battery, and because of the “warranty” they needed to install it for me. The 15-minute diagnostic was free, but depending on what they find, additional fees might apply to my $49 battery purchase with free installation. There’s no warranty remaining on my old iPhone, even THEY knew that. So I went on Amazon and I ordered this product for 1/3 the price, installed it myself with the directions & tools included, and referenced YouTube videos as needed; I was done in under 2 hours. Phone works great, battery is new, and haven’t had any other issues. If you have an older iPhone, my suggestion is don’t waste your time or money at the Apple store. Order it here. You won’t regret it; I sure don’t. Doing it yourself is also good for self-praise and esteem. You’re not incompetent...don’t let anyone make you feel like you need to pay THEM for something so basic & easy to install.
Trustpilot
1 week ago
1 day ago