
DOWNLOAD THE APP


Customer Services
Copyright © 2025 Desertcart Holdings Limited
DOWNLOAD THE APP


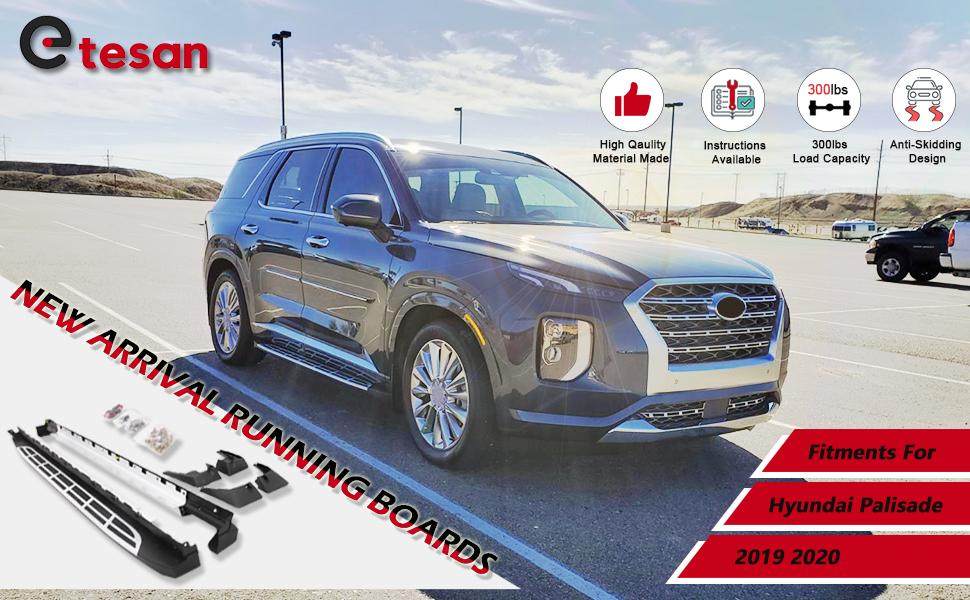
🚀 Step up your Palisade game—style and function in perfect harmony!
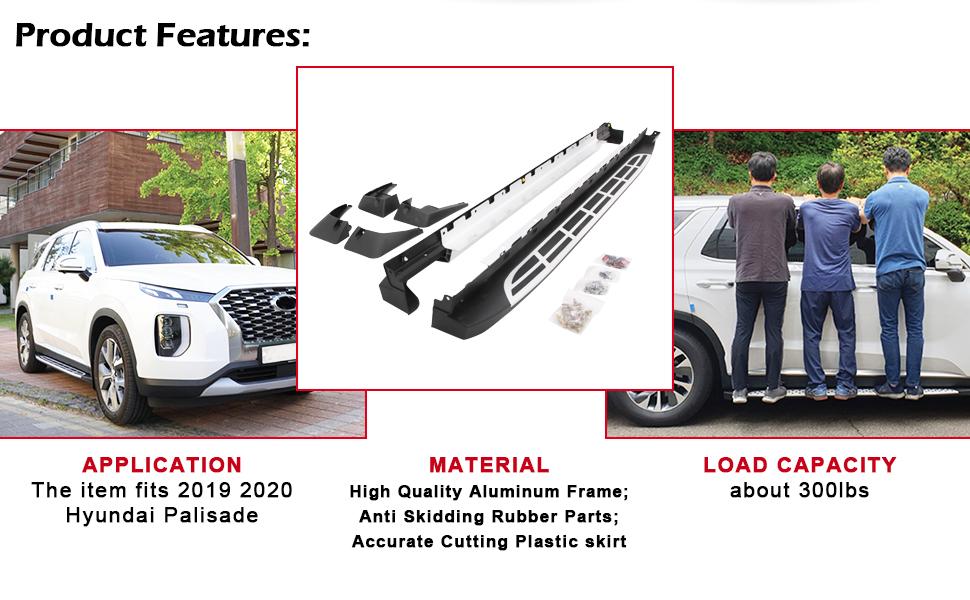
These Hyundai Palisade running boards by etesan offer a no-drill, easy installation solution designed specifically for 2019-2025 models. Made from durable stainless or alloy steel, they enhance both the vehicle’s accessibility and exterior appeal, complete with mudguards and sold as a left-right pair.


| Manufacturer | etesan |
| Brand | etesan |
| Model | Palisade running board |
| Item Weight | 32.9 pounds |
| Package Dimensions | 81.75 x 11.5 x 8.5 inches |
| Item model number | Palisade running board |
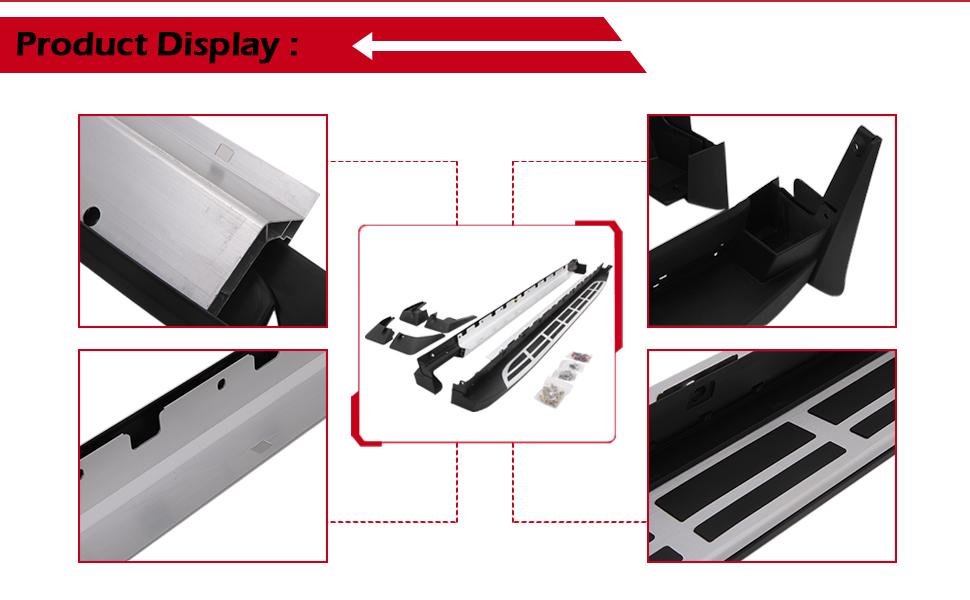
| Exterior | Stainless Steel or Alloy Steel |
| Manufacturer Part Number | kingcherPALISADETB2 |
K**D
Easy to buy, shipped fast, not super easy to put on, but doable....
In a nutshell, these are great running boards. I will try to add some pictures of the installation later when I'm on a different computer.First of all, they are well made and sturdy, out of extruded aluminum, and they fit perfectly on the vehicle. These also came with mud guards, which are not only integrated to fit perfectly with the Palisade, but also integrate on the front wheels in with the running boards themselves. If you already have mud guards on your car, you may issues making this work on the front. I would highly suggest buying these with the mud flaps included that fit perfectly around the car and also the running board that you will be installing.On the downside, the instructions came with pictures that were very hard to read or make sense of, and the instructions were in Korean. I used Google Translate camera app and my phone to be able to read them, which at least got me going in the right direction, the translation was pretty loose... If you are not handy, or afraid to tackle a project like this, I'd hire it done. My local Hyundai dealer wanted $400 for 2 hours of labor to install, but the Hyundai forum has others getting these installed more in the range of $250. Since my dealer had never put any on, I figured I could screw it up as good as they could.You are going to want a nice flat, clean place to work, with room on both sides of the car to open the car doors completely. If you have the ability to jack the car up a bit that will help, but I just slid around on the concrete floor of my garage. The vehicle doors need to be open for almost the entire installation, so either inside or on a good weather day.What is important to know about the installation that is very hard to glean off the instructions, is that you will be removing (essentially ripping off, literally) the black piece of trim that runs under both the front and rear doors. It is shaped like an L and is about 7 feet long. This trim is held in place by about 15 different plastic fasteners on the sides and bottom, as well as a screw in the wheel well both front and rear. The plastic mounts can be broken, because they will not be reused. The screws come off (to be reused), then you literally put some leather gloves on and rip this piece off from rear to front (I got it started in the back with a prybar). Be careful not to bend this too much while you do, however, because there is a rubber seal that you will be harvesting off this piece, and moving to the same location on the running boards before installation. You do not want to damage or crease this rubber seal. Once you get it started, a quick jerking motion away from the trim about every 10 inches will get the job done. Wear safety glasses because the plastic tabs holding this thing on will be flying around, and you are most likely laying on the ground under this operation. Have fun...Note also that there is a plastic piece that hangs down off this black plastic in the front of the rear wheel well, this piece is attached from the opposite side, and just rips off with the rest of the assembly, this will not be reused, so no worries.Like I said, if you don't know this whole assembly basically just gets yanked off without regard to damaging it, you can stare at this thing all day and wonder how it comes off. Just remember that the rubber gasket on it needs to be handled with care and not torn.Any fasteners left in the holes of the vehicle will be removed with pliers. These square holes (on both the side and bottom) will then be what you use to mount the new running boards.Start by putting in the nut assemblies into the square holes on the side of the vehicle (not the bottom). You will be skipping 3 of the side square holes as shown on the instructions, one on the front, one on the rear, and one below the pillar between front doors and rear doors. For a total of 8 nut assemblies. You then mount the front of the running board first (loose), leaving the back hanging, so that you can slide the rear of the running board up in between the rear wheel splash area (i'm talking about the interior plastic that lines the entire wheel well, you want that to drape over the running board, not under) . The remainder of the 8 side bolts will be placed and tightened. Then the 3 square holes that have no fasteners in them will be lined up with plastic push fasteners, which just require a smack with the palm of your hand or a rubber mallet.Almost done now, there are now about 6 bolt and nut brackets that will be placed in the square holes UNDERNEATH the running board. I used a deep well 10 MM socket and an electric driver and those just slide into the hole, then tighten. When they are tight they position themselves on both sides to stay in place.Finally, the front mud flap attaches over the fender and running board with 2 screws in the fender (one that you removed earlier, and an additional one above it), as well as a new plastic trim bolt at the bottom of the mud flap and into the new running board.Some minor cleanup items and you are done, which include plastic covers over the bolt locations over the side bolts.The rear mud guards are similar to the front, take out two of the screws in the wheel well, and use them and a plastic bolt at the bottom the mount the rear mud guard. (that bolt was supplied with the mud guards)Some things I forgot to mention include using a sharp razor knife to remove any of the weather sealant that protrudes out from the frame (this step is detailed in the instructions), by doing this, the running board is allowed to mount in tighter to the vehicle. Also, there are a few rubber grommets under that original piece of trim that will need to be pulled out and then placed in the holes on the new running boards. If you leave them in place they will prevent the running boards from being mounted as snug and tight as you want.Do NOT put the front mud guards on until you have the new running boards installed, they will be in the way, so do them last.The seal I was discussing earlier is by far the most tedious part. It is very tender and you need to use great care not to rip it. It is held on the original trim piece exactly like the new running boards, by a series of little plastic clips and holes. You can figure it out just by looking at it once the original trim is ripped off the vehicle. I just discarded the original trim after this piece was harvested. I used great care to make sure the seal was securely and perfectly mounted on the running boards before they were mounted. It wasn't hard, just a tad tedious. Take your time.The running boards are perfectly integrated into the vehicle, and look like it was just made that way. They are also very strong, with something like 15 bolts holding them on. They aren't really that useful for stepping on, unless you are a kid or are really short. But to be clear, we purchased these to add a little dimension to the vehicle, as well as provide protection to the vehicle from rocks and stuff flying up off the road. They really look good.The first running board, as well as instruction reading, and study, took me about 4 hours to install, the second one took maybe an hour if that. So the learning curve is huge. If you have a helper for the actual mount it might help to have somebody hold one end while you attach the other. My wife was on strike.I could not find any decent video or other instruction anywhere on the internet, other than people saying they had done it and it wasn't too hard. So I figured you would appreciate my perspective having done it, and I will try to get some pictures up sometime.In a nutshell, if you think you are not up to this project, and have doubts, hire somebody to do it. Otherwise, if you have done stuff like this in the past, or are willing to learn and maybe redo some mistakes, then go for it. They are super nice running boards, and make the vehicle look a lot better in my opinion.
B**R
Install was difficult
Just as described, fit n looks great. Pain on the ass to install.
J**H
Factory look 👀
Having little children needing help getting into a SUV can get a little challenging at times especially if you’re in a hurry. I knew I would need running boards to make it easier for them to step up into the vehicle. Looked these up and decided to order them. Once the package 📦 was delivered, I immediately opened the box to verify that all parts and instructions were inside. I did look up a video online to see how the install would be. The instructions were just okay. There was very little verbiage to explain everything but the pictures did help a little more. The video I watched was very helpful and made the install much easier than just going off of the instruction manual. The finished product looks really good. It’s as if the vehicle was bought like this. This helps with the kids so much.
S**N
Easy with the help of utube
Instructions are not good. U-tube makes it easy. All parts included
S**R
A Sharp Looking Addition
As of the time we purchased our Palisade Limited, Hyundai was not offering running boards as an accessory. We chose this one, and the delivered item(s) looked exactly as presented. We are perfectly happy with them. The mud flaps were an unexpected extra. As at least one reviewer has already noted, the installation process is lengthy. I opted for a professional install, and it took about 4 hours. It was a long process, as the technician debriefed me. The result looks great!
H**R
Rubber part is peeling, after only 6 weeks
After only 6 weeks the rubber parts started to peel. At this pace they will not only be unusable in less than a year, but they already make my brand new car look cheap and bad. I would return if I could! Stay away from this product.
N**A
Running Boards
These running boards look absolutely amazing on my 2024 Palisade. I recommend them to everyone. It took only about an hour and a half to install them.
A**R
Found scratches while unboxing.
I have bought these boards after doing plenty of research online. These fit perfectly to my 2022 palisade and it has given a new look to my vehicle. But, when i opened it from the box i have found plenty of scratches on aluminum and as well as the saftey rubbers on the boards. They didn't procide any kind of tool with it as well.I wouldn't say waste of money. But, it is not upto the mark.
Trustpilot
3 weeks ago
2 months ago