🌟 Elevate your space with artisan-crafted storage that speaks volumes.
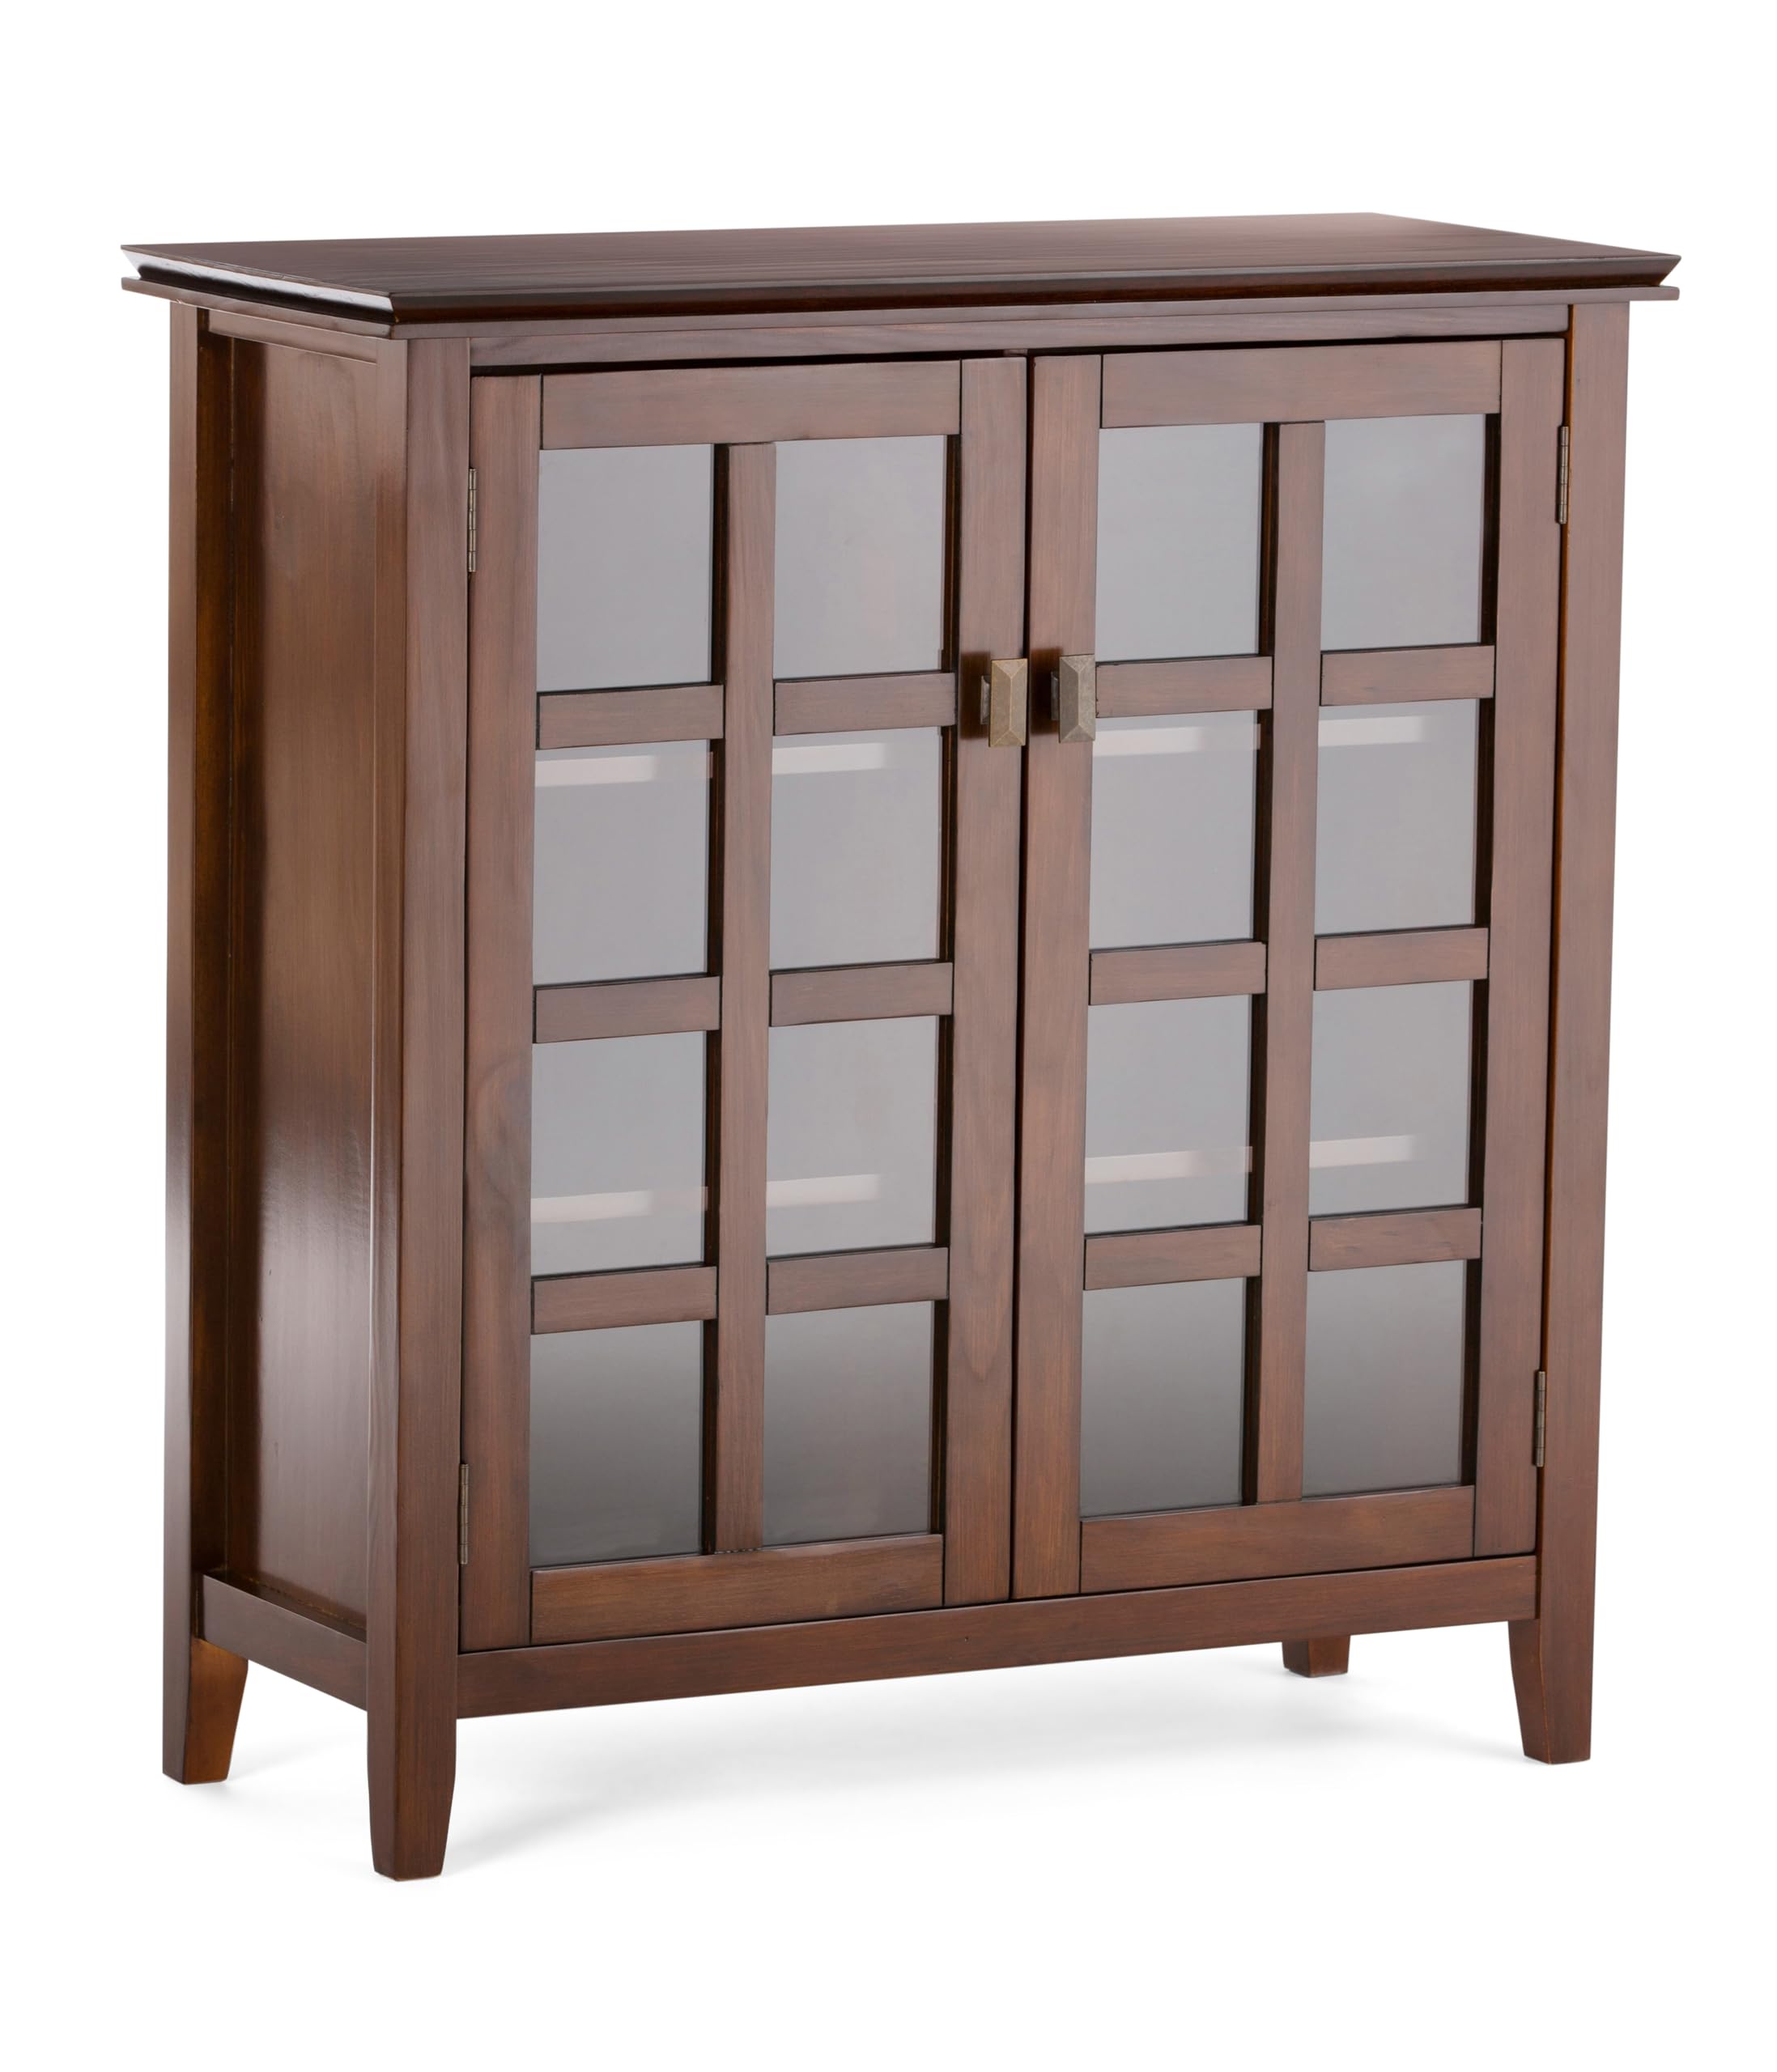
The SIMPLIHOME Artisan Solid Wood 38-Inch Transitional Storage Cabinet is a handcrafted pine wood piece finished in rich Russet Brown with a protective NC lacquer. Featuring two tempered glass doors and four adjustable shelves, it offers versatile storage for living rooms, entryways, or offices. Freestanding and robust, it supports up to 150 pounds, blending rustic charm with practical durability.


| Brand | SIMPLIHOME |
| Color | Russet Brown |
| Recommended Uses For Product | Indoor |
| Product Dimensions | 16.1"D x 38"W x 40.6"H |
| Special Feature | Storage |
| Mounting Type | Floor Mount |
| Room Type | Living Room |
| Door Style | wood |
| Weight Limit | 150 Pounds |
| Finish Type | Lacquered |
| Size | 38 inch |
| Number of Shelves | 4 |
| Number of Pieces | 1 |
| Item Weight | 66.1 Pounds |
| Base Type | Legs |
| Installation Type | Freestanding |
| Top Material Type | Wood |
| Handle Material | Bronze |
| Back Material Type | Wood |
| Assembly Required | Yes |
| Frame Material | Wood |
| Number of Compartments | 4 |
| Is Customizable | No |
| Number of Levels | 4 |
| Global Trade Identification Number | 00840469076365 |
| UPC | 840469076365 |
| Manufacturer | Simpli Home, Ltd. |
| Item Weight | 66.1 pounds |
| Country of Origin | Vietnam |
| Item model number | AXCRART15-RUS |
D**D
A Nice Dining Room Buffet
I needed a buffet for my dining room. I was so glad that Amazon had something that I liked. This is a wonderful buffet. I wanted it in time for Christmas. I received it a few days before Xmas. This buffet is not for someone who is lazy. It took some effort for me to assemble it. You will need a drill to properly install the back panels of this piece of furniture. Well guess what, for the price and the effort it took to assemble it, it was definitely worth buying. The packaging for this piece of furniture was outstanding. It was very well packaged. The appearance and quality of the buffet is excellent. Even though it was a piece of furniture that required assembly, it does not look cheap. I uploaded two photos as proof that it is a nice looking buffet. It has the durability and style that I like. It fits into the space that I had designated for it just right and it's not to bulky. And I even love the color. My family loved it too when they saw it when they came over for Christmas dinner. I would recommend this buffet to other potential customers.Happy Customer. (A+)
O**S
Excellent Quality
I am impressed not only by the quality of the cabinet, but also by the instructions, hardware and simplicity to assemble it.This is by far the best assemble-yourself piece of furniture I have ever bought.
C**G
Great piece of furniture for the price, easy assembly
I bought this to replace an ugly etagere and couldn't be happier. For an "assembly required" piece of furniture, this is made of solid wood except the backing, glass in the doors, and metal in the hardware. My order came fully labeled, the instructions were straightforward, assembly took about an hour by myself. The cabinet is heavy. I have several spare parts left over. The quality is good for the price and the design is timeless if you like Shaker or farmhouse style. My overall rating is 4/5 because there are some minor dings and finish flaws but those are easily remedied with a stain marker from your local hardware store and never tell the difference. 100% recommend.
J**E
Nice Piece
This cabinet came very well packaged an went together pretty easily.The wood is very nice. There are some areas that one could call blemishes or imperfections in the wood, but this is real wood, so as my wife says...gives it personality.For the money, this is a really nice piece.
S**E
Don't waste your money
Bought this to hold some mugs in the family room. Upon assembling it found that the pot metal cam action fasteners broke if you tighten them so the cabinet wouldn't shake when you bumped it. The top looks like it got caught in the planer and had a pretty deep gouge in it, instead of scrapping it they just put it in the box. The doors are not square so hanging them straight was impossible and the spot drill holes weren't even close to being in the right spots. I'm going to have to completely disassemble the unit and glue everything back together and figure out what to do with the out of square doors. If Amazons return policy was better I would have returned it for a full refund, but didn't want to have to drive 40 miles to return it to a Fedex or UPS Store. So beware of buying heavy objects from Amazon. Save your money on this cheaply made piece of junk and look elsewhere.
F**A
Well made, well packed - worth the cost
Finally got a chance to build this after two months, and I'm impressed.At first I was a bit confused at the number of bags of hardware, but then I realized that quite a bit of it was extra hardware categorized in bags in a separate bag - a nice touch.The unit arrived very well packed, and mostly put together - just a quick matter of attaching the sides and center to the base, putting the top on, screwing the back on (a joy compared to hammering on cheaper units!) and hanging the doors.The instructions specify to use a metal 90-degree angle ruler to ensure things are true before attaching the back. I didn't have one, so I used the packing styrofoam, and things looked and worked fine. Hanging the doors was a bit fiddly and I needed an assistant to hold them while putting in the initial screws, but otherwise it was an easy one-person job.Ended up VERY sturdy, feels well made, and looks very nice! Worth the extra cost to me.
N**R
Well Designed
Beautiful design, good materials, good instructions. Much better than most furniture found on this website.
L**U
I didn’t expect that it will be so beautiful)))
The quality is very very good. Looks nice. The only small scratch was inside but I forgot about that right after installing. Also, as a girl, I have assembled it easily but one door was few millimetres on a side and even my husband couldn’t fix it later. Please , install doors together with one person who can hold)))
Trustpilot
1 week ago
3 weeks ago


