
DOWNLOAD THE APP


Desert Online General Trading LLC
Warehouse # 7, 4th Street, Umm Ramool, Dubai, 30183, Dubai
DOWNLOAD THE APP
Desert Online General Trading LLC
Warehouse # 7, 4th Street, Umm Ramool, Dubai, 30183, Dubai


🛠️ Mold your outdoor oasis—because your garden deserves a glow-up!
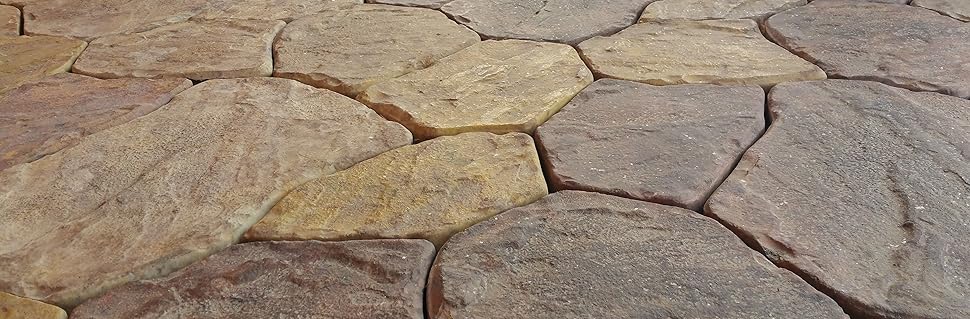
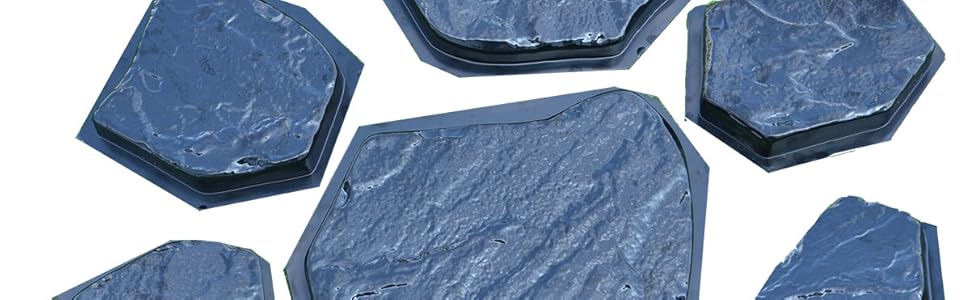
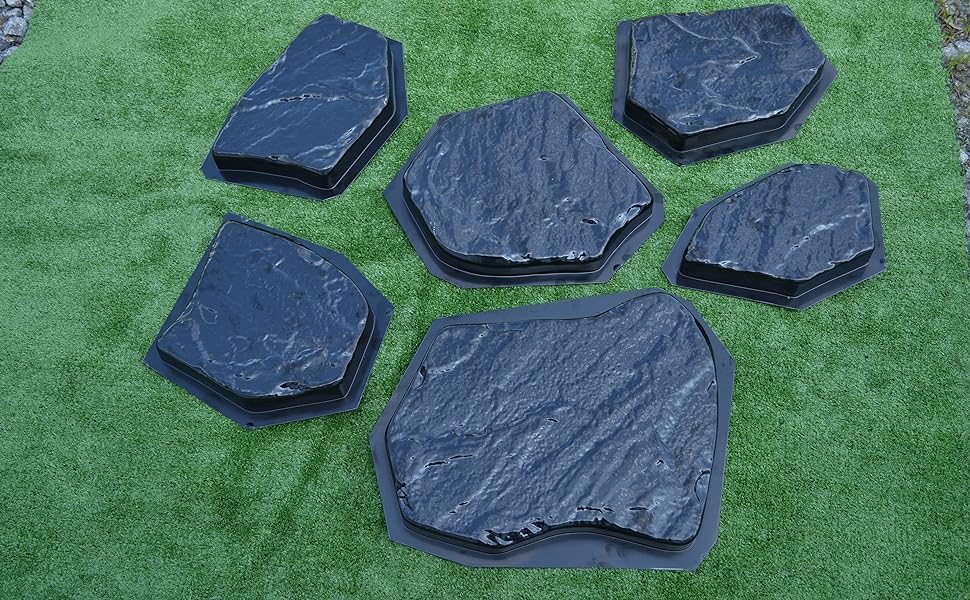
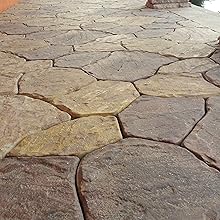
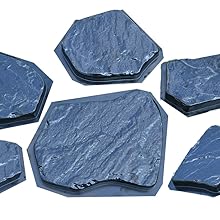
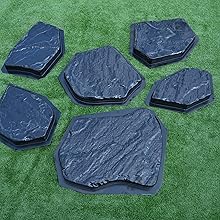
This set includes 6 ABS plastic molds designed for casting concrete paving stones with varied textures, covering 0.37 square meters per use. Each mold is 38 mm thick and reusable, enabling you to create personalized, durable garden paths or patios that can be painted to match your style.

| Package Dimensions | 48.59 x 36.53 x 9.86 cm; 1.09 kg |
| Item model number | 4336446273 |
| Number of pieces | 6 |
| Batteries Required? | No |
| Batteries included? | No |
| Material Type(s) | Plastic |
| Colour | multi-color |
| ASIN | B071FT57FF |
C**K
These are very well made and durable. I did 7 batches in them and they look like the day i bought them. I would say keep them out of sunlight as UV would likely damage them eventually. Using a 66lb/30kg bag of quickcrete with the max recommended water ratio works great. It fills 1 set of molds perfectly, and it’s liquid enough to minimize bubbles. I vibrated the molds with an oscillating tool after filling to remove the bubbles completely. I broke the first stone i tried to remove after 12 hrs. I waited 24hrs for the remainder of the stones and had no issues. The stones do remain somewhat fragile for 48 hrs total. Bees wax seemed to be the best mold release agent. I applied with a hair dryer and paintbrush, then washed the molds after use, then reheated the bees wax. I only had one mold which was difficult to release using this method, but i suspect I didn’t clean the corners well enough. I dyed my stones different colours to match my house using a combo of Charcoal and Red concrete dyes. I suspect you could also use any water based clothing dye as well although I never tried that. I found the pure red concrete dye seemed to cause many more bubbles even after vibrating. All in all they turned out great, and I’m very happy with the result. They cut fairly easily using a masonry blade on an angle grinder. With only 1 set of molds this was fairly time consuming, but very cheap for what you get in the end. The picture is just a rough layout, not a final install with cut stones. Enjoy!
H**O
This was an excellent opportunity to learn about concrete. I got it down to one 20kg (44.1lb) bag plus another 4kg (8.8lb). Total 24kg (52.9lbs) of high strength concrete mix. 6 bags make 5 sets. This means the molds are filled to about 1/2" from the top, but this equals less cost, weight and mess. I grease the mold with coconut oil, and clean the molds after each use. Bubbles in the concrete mix can be an issue, so a defoamer admix or vibrating table helps. To cure the concrete I leave it in the mold with plastic wrap over it for a full week. I'm not in a hurry.
M**S
I love these. I used old cooking oil (canola and olive) as mold release and swooshed a bit on paper towel to help get the concrete hardened out of the molds. I also used a massager, the log kind for athletes wrapped in a trash bag to keep it clean, and put a cat litter box on top of it upside down, then put a mold at a time on top of that, to shake out the bubbles that form (cheap shaker table). Home Depot, maybe Amazon too, sells polypropylene sheets about 1/2” or so thick, that replace the slag you would normally put under pavers. Saves your back. The patio I made was about 45 bags of 50 pound each high strength crack resistant concrete. I am not strong enough to move 80 pound bags (a lady). Screed the sand, put down a barrier layer, and tamp down the pavers. I dyed some of them at random. I used pigments but heard you can just add paint too. Took 24 sun hours for them to cure completely, and for a few, instead of cutting with a saw, I used popsicle sticks to partition where I wanted a half sized piece, and forced them into the mold once the concrete had started to set. For filler around the pavers, I used high grade stuff, ~ $25 a bag near me, not the filler you can get at HD. It is called Polybind dust, comes in 2 colors and fills up to 6” gaps. I used it on my driveway too, rather than the caulk filler many use when spaces between concrete are a trip hazard. Have had patio 2 summers now. Looks great. Sealed it with some high $$ stuff. Not one weed came up, and I live near woods. Awesome product. Buy two sets if you can, of molds. Work goes faster. Peace. ADDED A THIRD PHOTO 10/22/2024. THESE ARE THE PAVERS TWO YEARS LATER. IT IS FALL, THEY HAVE NEVER HAD A WEED, and HOLD UP GREAT. 10/7/2025 update…The last photo, with fencing, is another patio I built, with a connected walkway. Built this summer, in Michigan. The patio built this year, is 13x12 feet or so, edged with red paver bricks store bought, and I poured 45 bags of 50 pound crack resistant quikrete, with fiberglass in it. I used leftovers for a walkway between the other patio I made three years ago, and the new one. Those leftovers are not fitted like the pattern but the rest is. I use two sets of molds, about 2.5 bags concrete for each 12 molds filled, about 7.9 sq feet each set of 12 poured. You can dye some. I used brown, terracotta, black etc. I used a lymphatic drain shaker/exerciser, with garbage bag over it to shake bubbles up from inside the molds, and used old olive and canola oil as mold release agent (coat the molds! before filling them). I mixed pigments (powder), dyes etc, and left some untouched. Concrete batches vary in color anyhow. You can color them afterward too, and will use less (spray bottle and damp cloth but if chipped some day old concrete with no color will show through). Sealed about three weeks after completed, with Behr wetlook sealer. Used leaf blower to even out the coats. I love these molds. A couple are cracking on a lip, but duct tape can fix it. I used popsicle sticks as dividers on a few edge pieces, some I sawed, and some edge pieces I made without the molds, using plastic edging to make the right shape, then poured, and pushed the mold bottoms down on top of my custom pieces (coated mold bottoms with oil) to make look natural. I used the black polypropylene sheets as underlayment for paver base. In summer pavers in the sun with this underneath are SCORCHERS because there is no heat transfer to the cool ground like when you use #1 and #2 paver prep rock and sand. So think about that. They are convenient and I use them…but the pavers will be very hot if in full sun all day.
P**E
25 mètres carrés ! belle terrasse, c'est beaucoup de travail pour réaliser une telle surface, mais le résultat est parfait. Une douzaine d'heures pour laisser prendre le béton à chaque série, il faut la place, ensuite il faut le stockage, ensuite la pose avec les découpes. J'ai posé les dalles sur une surface bien lisse, calées avec du sable bien fin. Les couleurs diminuent au fil des mois, mais cela reste original et joli.
R**.
Results are very good.
Trustpilot
2 weeks ago
1 month ago