We remain fully operational. Our teams are working around the clock to ensure your deliveries continue safely.

DOWNLOAD THE APP


Customer Services
Copyright © 2025 Desertcart Holdings Limited
DOWNLOAD THE APP

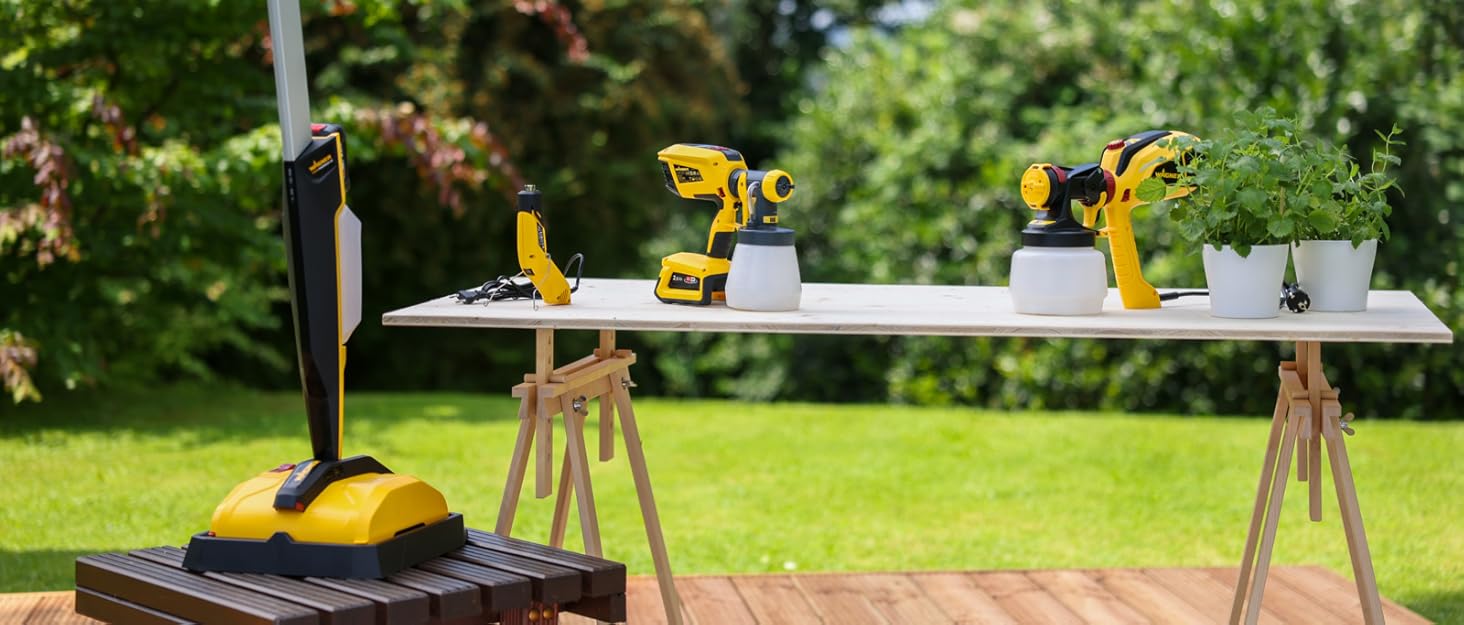
🎨 Spray Smarter, Not Harder: Transform your space in record time!
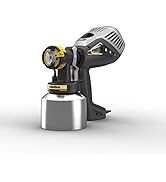
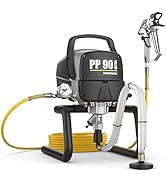
The WAGNER ControlPro 250R is a professional-grade airless paint sprayer designed for medium to large projects. Featuring a powerful 110 bar adjustable spray pressure and a 9-meter hose, it covers 15 m² in just 2 minutes. Its lightweight gun with a two-finger trigger ensures precision and reduces fatigue, while innovative nozzle technology minimizes overspray by up to 55%. Compatible with a wide range of water- and solvent-based paints, this sprayer is ideal for interior and exterior surfaces including walls, ceilings, wood, and metal.


| ASIN | B0747QMYDY |
| Batteries Required? | No |
| Best Sellers Rank | 28,074 in DIY & Tools ( See Top 100 in DIY & Tools ) 32 in Paint Sprayers |
| Colour | Yellow |
| Customer Reviews | 4.2 4.2 out of 5 stars (871) |
| Date First Available | 25 July 2017 |
| Hose Length | 9 Metres |
| Included Components | 1 x Basic unit 250 R Hose (9m) Hybrid Gun Filter Set Tip 311, 517 |
| Item Package Quantity | 1 |
| Item Weight | 7.2 kg |
| Item model number | Control Pro 250R |
| Manufacturer | Wagner |
| Material | Metal |
| Measurement System | Metric |
| Number of Pieces | 1 |
| Part Number | 2371070 |
| Pattern | Single |
| Power Source | Corded Electric |
| Product Dimensions | 39.54 x 45.99 x 33.47 cm; 7.2 kg |
| Special Features | Airless, Lightweight |
| Style | 250 R |
P**L
Steep learning curve, but once mastered, works well
The instructions are seriously lacking, but once mastered, this machine works well. Took me around 3 hours to figure out the quirks, so to save you some time: 1. contract matt emulsion with the correct filter and nozzle (according to instructions) will need to be watered down by 10-20% 2. the pick up / collector needs to be submerged well below the surface of the paint, otherwise the machine loses pressure, the pump stays on and the gun just dribbles. Its clear to identify, and happened repeatedly when the 10 litre paint tub got down to around half full (despite the pick-up being well submerged. 3. cleaning is best done by pulling through clean water for a few minutes (with spray nozzle removed), then give the gun, filter and pick-up a thorough clean. You can avoid wasting paint by catching the watery paint in a container and use the next day to dilute your neat paint. its not quite as messy as I expected, doing ceilings goes everywhere as you might expect, but with walls its not bad, and the spray focus is pretty good. Its a nice bit of kit that will save time if you have a lot of surface to paint. Probably not ideal for the home, but warehouses, commercial premises etc., its ideal. And at this price, cheaper than hiring something similar.
H**N
Brilliant - it’s saved me Hours
I purchased the 350 M sprayer and it’s brilliant. I am painting out a large workshop area and I started with the roller and brush method - it took me about 4 days to do half of it when someone told me about the airless sprayers - I had never heard of them. I wish I had sooner - what took me 2 days with the roller and brush I did in 2 hours, it’s amazing and really easy to use and it leaves a really nice finish. So the down side is that you must mask any areas you don’t want spraying and cover the floor really well it’s not so much spills but the fine mist will cover anything you don’t cover. Cleaning the machine isn’t difficult but takes a little longer perhaps than cleaning a roller and tray but who cares when it saves so much time. The machine isn’t bulky or heavy and is easy to move around all you need to do is plug it into a power supply. Would I recommend this product - absolutely - it’s already paid for itself in the time it’s saved me.
D**N
Great finish but...
Painted our large kitchen in a day. The finish is excellent. The spraying was done in the time it would have taken me to paint one wall with a brush - not the ceiling. That essentially is the good thing. The bad is the time it took to mask up, the disruption, the overspray, the fabric that allowed overspray to seep through. In short, making and cleaning was a nightmare. I came away thinking what a great tool it is in the right circumstances. If you have an empty house to paint, this is the machine for you! If you have several large surfaces to paint, it will do it in no time. Getting the paint mix right was relatively easy. The gun was fine, easy to use... but hard to clean. This is another minus - cleaning the machine and pipework. I wanted it to be spotless so it took a long time. Again, this is all about the amount of painting you have to do - the more the merrier. The less the more miserable. It is that simple.
H**R
Great for my use!
First time using a spray gun...takes a bit of getting used to! One tip, don't start on a low number, the amount of paint that comes out seems to be the same but not dispersed as well as at higher pressures! After not reading the manual and figuring it out solo, this gun gave great results but you either need to be spraying an empty room with no flooring or spend a ton of time prepping to cover everything. I cannot express EVERYTHING enough! I made the initial mistake of laying a few dust sheets...you need to weigh them down as the spray gun pressure will blow them all over the place and paint will get on the floor Great product though and gave perfect results. Just stand a meter away, high pressure (number 5) and steady / consistent movement to get even coverage
T**N
STAY AWAY
unnecessarily expensive. It is possible to find products that do the same job and are much more affordable. I do house painting work. And you could get into trouble with this machine. I think £400 is wasted. Installation and cleaning are not as easy as one might think. Thank you for allowing me to share my experiences here.
S**S
No customer support from Wagner and nor they care. Bad quality product. Please buy graco products instead. Best customer support. Even the chinese brands provide decent support.
M**D
Der Stecker ist für deutsche Steckdosen nicht richtig
م**د
يحتاج خرطوم أطول من الموجود اسعار قطع الغيار من فلاتر مرتفعه من نفس الشركة بينما توجد فلاتر بسعر أقل من شركات اخري
Trustpilot
2 days ago
1 day ago