


🔥 Elevate your gaming rig with style and power!
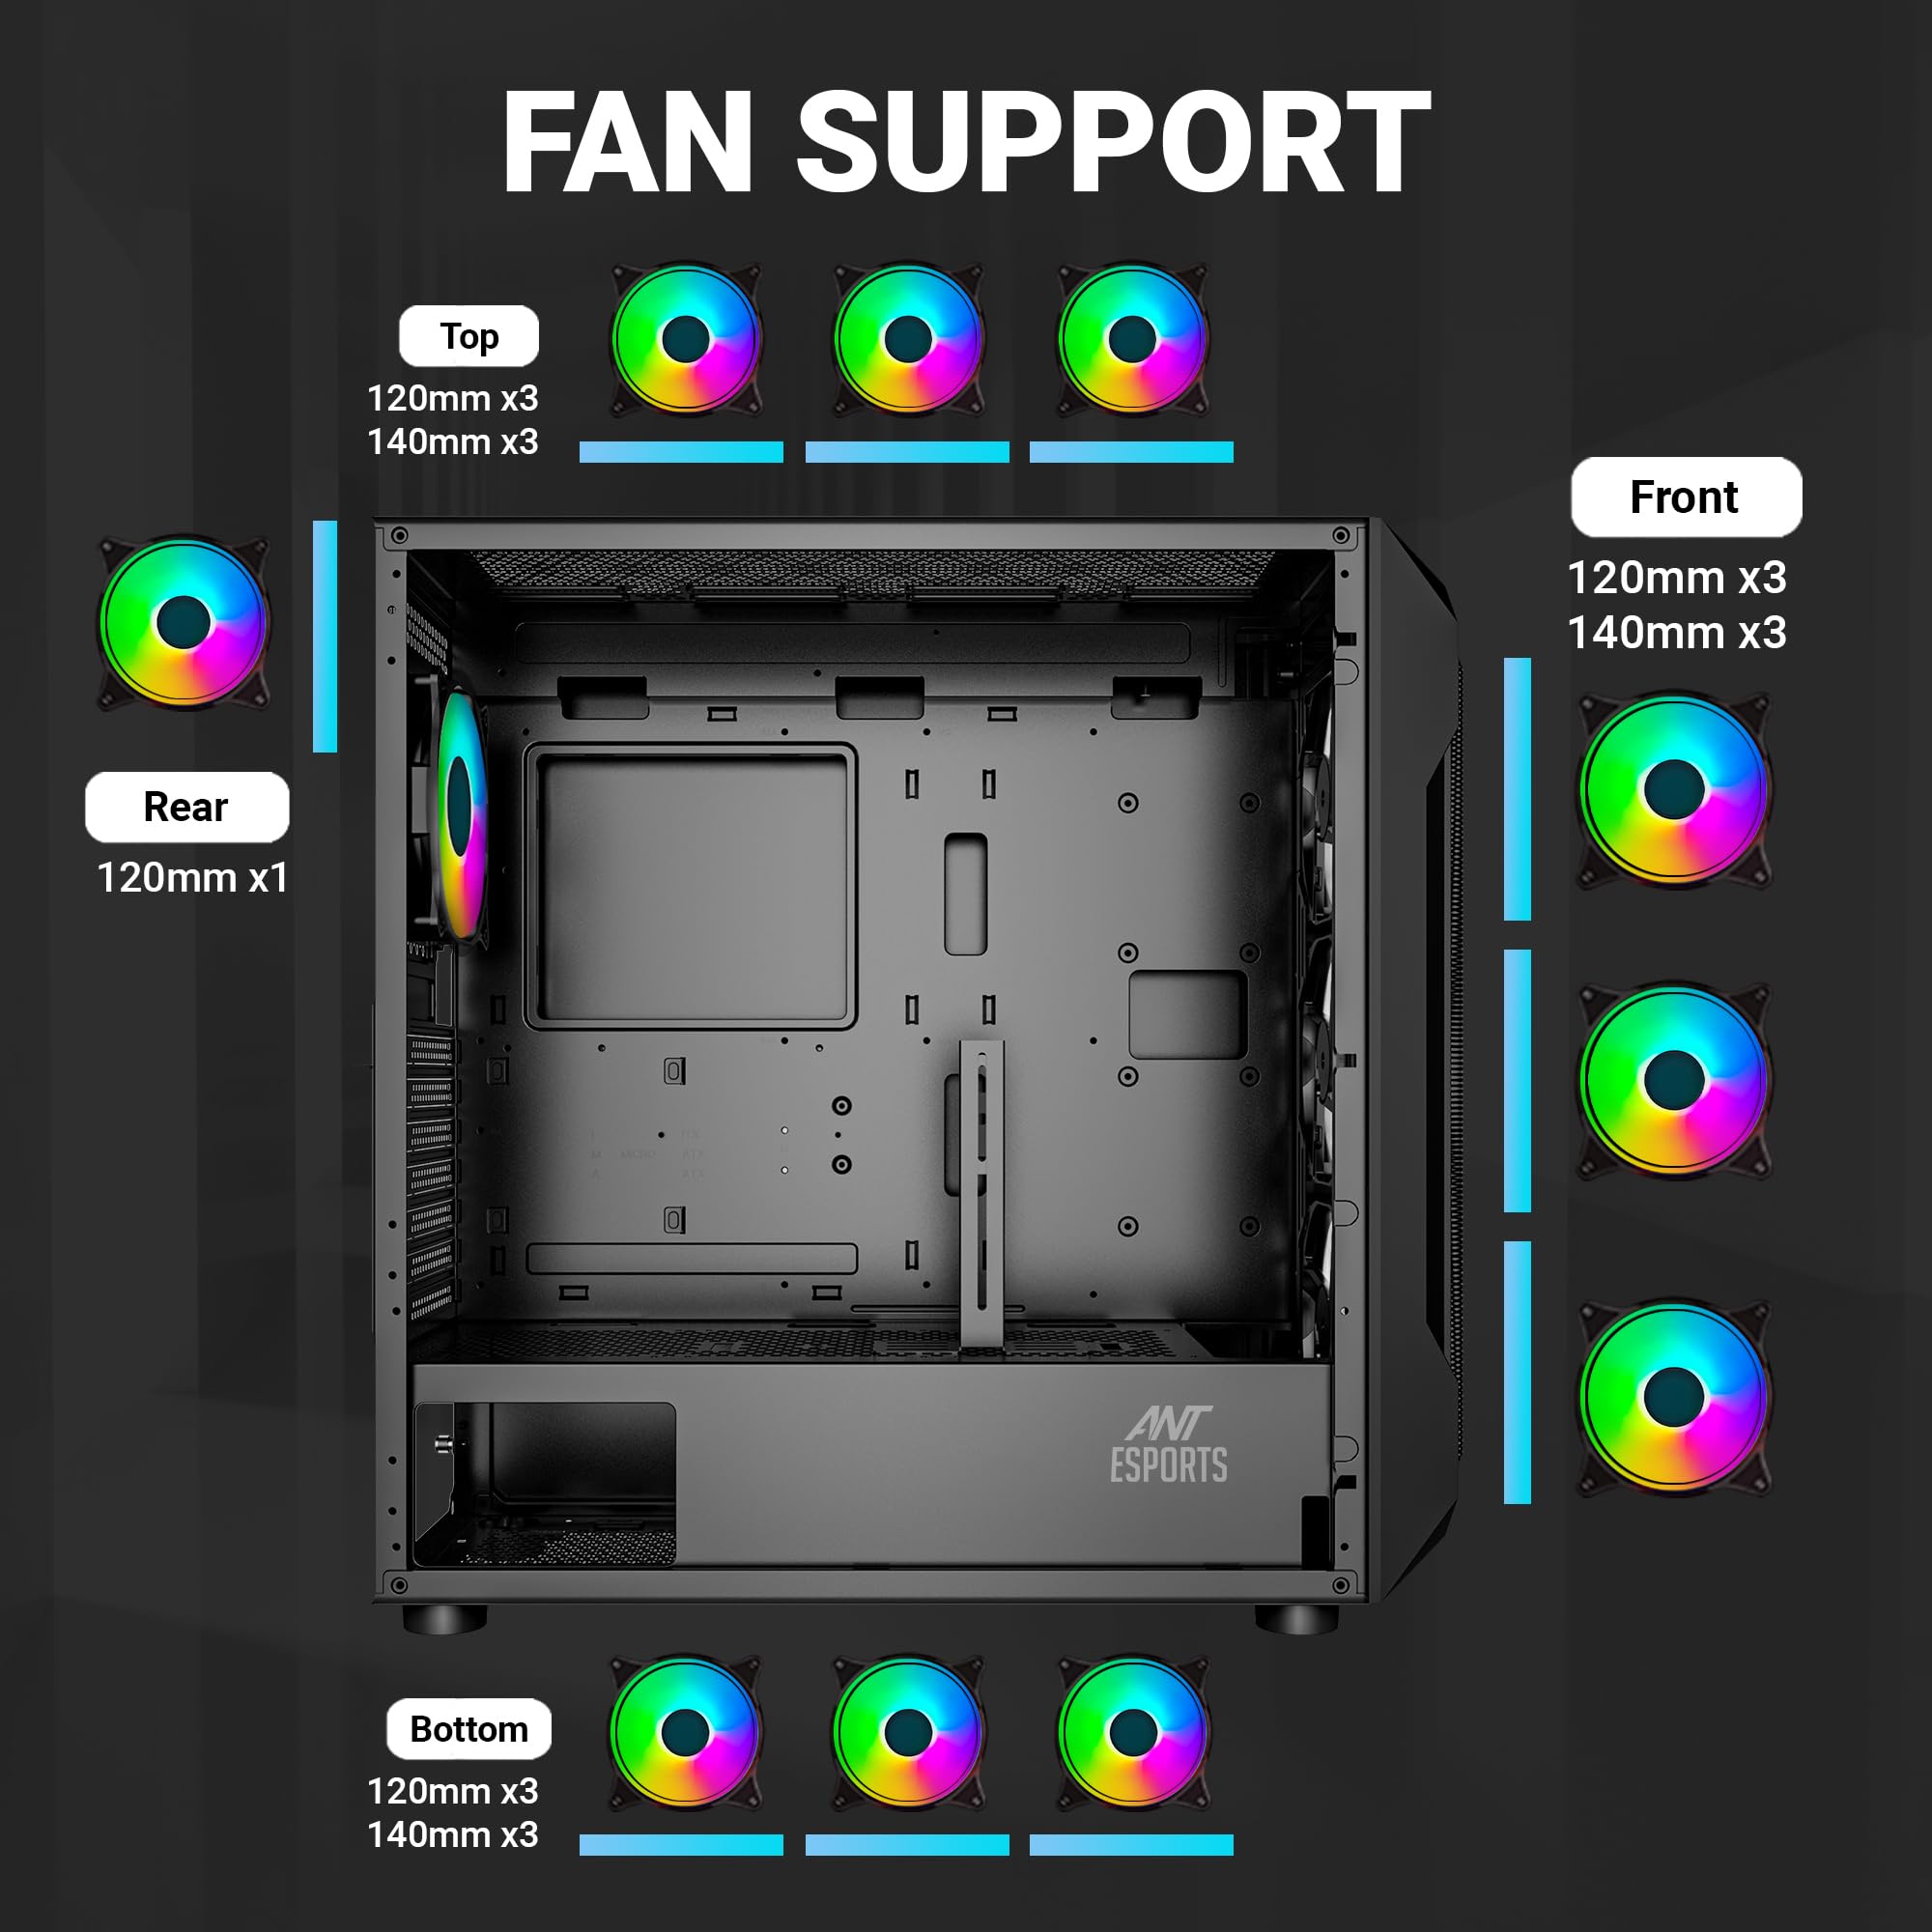
The Ant Esports ICE-410TG is a sleek black mid-tower gaming case designed for serious builders. It supports a wide range of motherboard sizes including E-ATX, M-ATX, and ITX, and features a tempered glass side panel to showcase your components. Equipped with 3 ARGB front fans and 1 ARGB rear fan pre-installed, it delivers excellent airflow and vibrant lighting. The case offers extensive expansion options with 7+2 slots, multiple drive bays, and front I/O ports including USB 3.0 and Type-C for modern connectivity.


| Brand | Ant Esports |
| Manufacturer | Ant Esports, Ant Esports |
| Series | ICE- 410TG |
| Colour | Black |
| Item Height | 48 Centimeters |
| Item Width | 20.5 Centimeters |
| Product Dimensions | 47 x 20.5 x 48 cm; 6.39 kg |
| Item model number | ICE- 410TG |
| Number of USB 2.0 Ports | 1 |
| Number of USB 3.0 Ports | 1 |
| Manufacturer | Ant Esports |
| Country of Origin | China |
| Item Weight | 6 kg 390 g |
Trustpilot
1 day ago
1 week ago